Easy Taco Soup in a Jar Recipe
Whether for food storage or just for crazy night dinner emergencies, having this Meal in a Jar Taco Soup can be a lifesaver! Just add water and cook!!
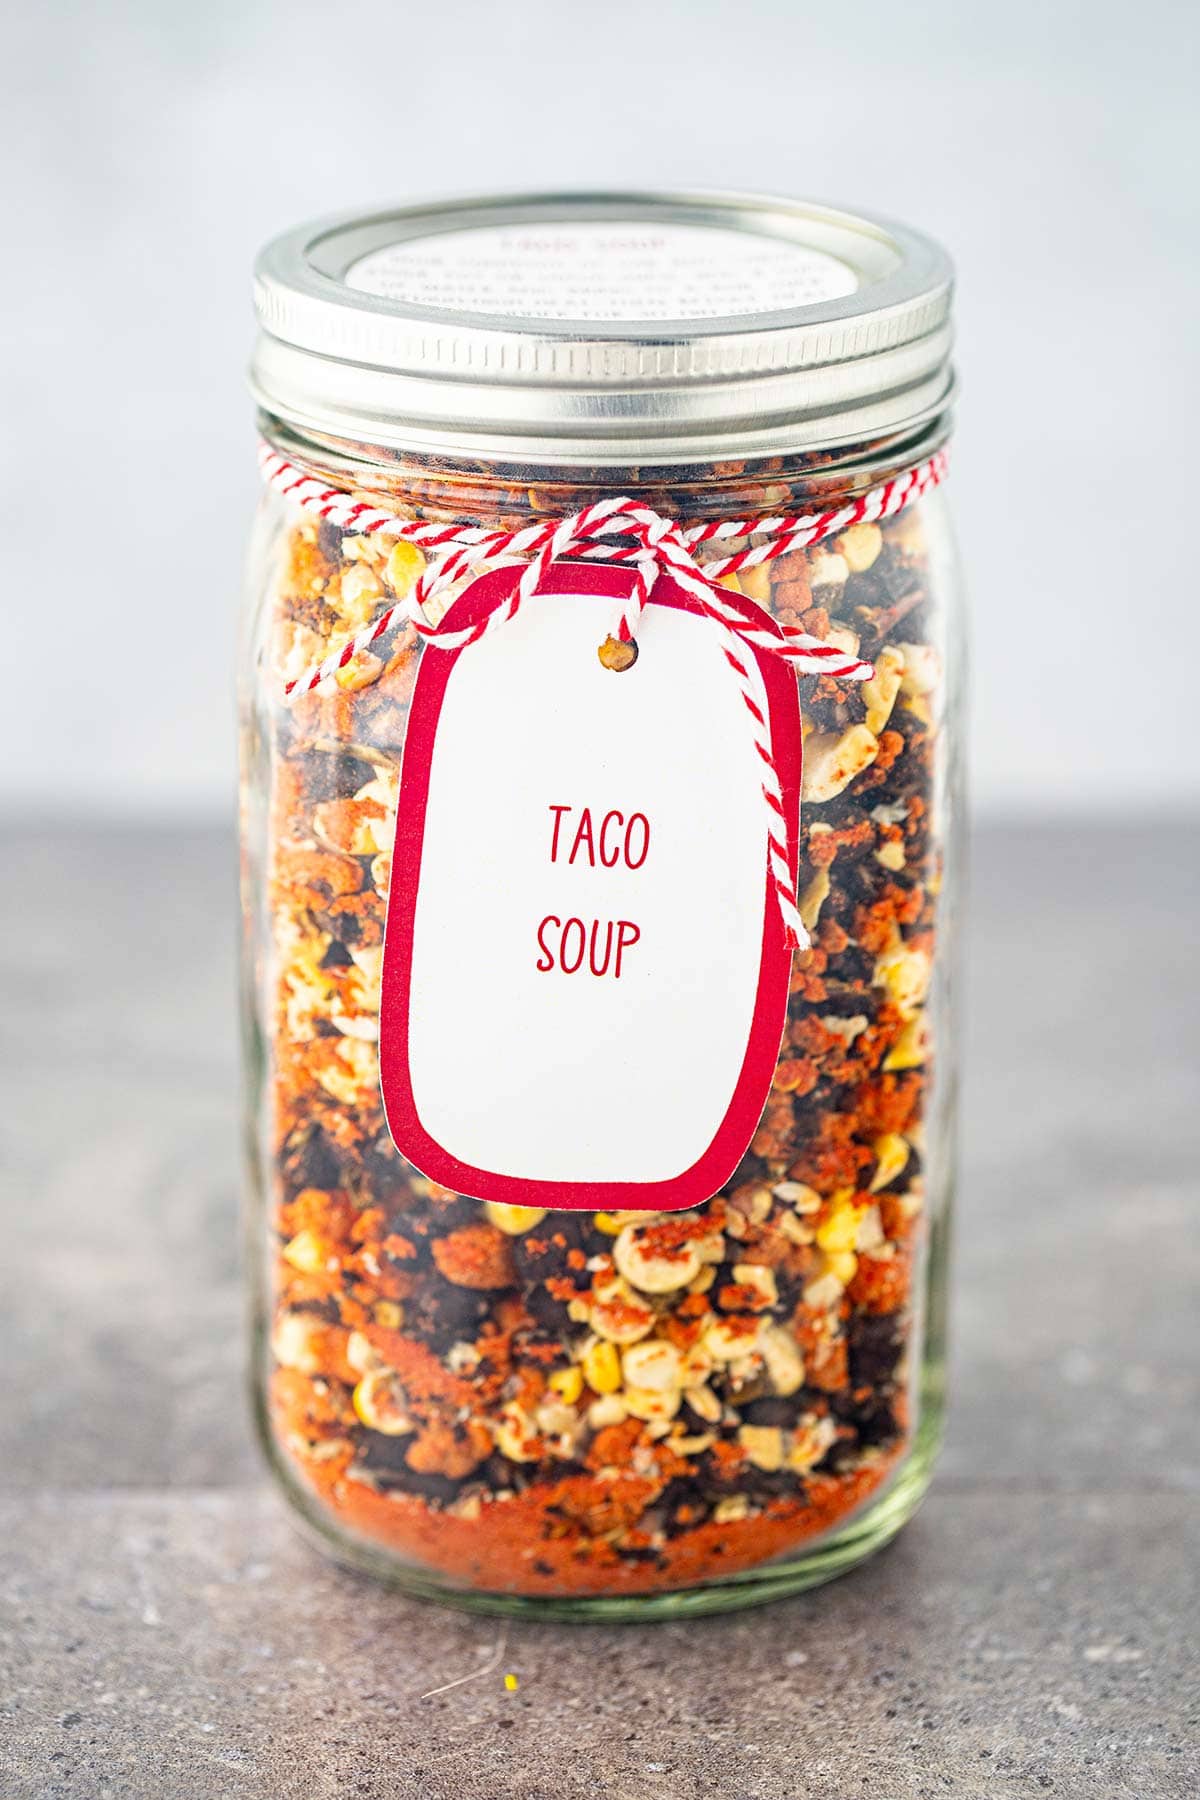
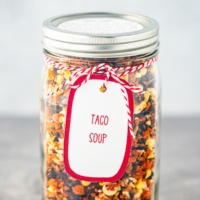
Taco Soup in a Jar
This Taco Soup in a Jar recipe is an easy meal that is sure to please the entire family!
It’s a great mason jar recipe that makes up quickly because you just add water and voila!
This is also one of my favorite recipes for soup in a jar because it is a great idea for a mason jar gift!
There’s just something about a hearty soup that is so comforting, especially on a cold winter evening.
And having it all ready to go as a meal in a jar is even better!
Whether you use this as part of your food storage, for a Christmas gift, or just want to keep some on your shelf for busy weeknight dinner emergencies, this soup in a jar can be a lifesaver!
This easy taco soup recipe goes from jar to bowl in 30 minutes, and the hardest part is pretty much just getting the lid off the darn jar!
The best part is that you can dress it up with all your favorite taco toppings. Or try some new and different toppings to explore new flavor combinations.
It’s also a great way to sneak some healthy recipes into your food storage.
And this soup in a jar recipe works great for camping or hiking trips. (Just seal in a mylar bag or vacuum-sealer bag rather than a mason jar.)
So let’s get started…
Items Needed to Make Meals in a Jar
To successfully be able to seal these meals in a jar, you will need a few specific items:
- wide-mouth quart mason jars: you’ll also need a NEW jar lid and a ring (can be used or new but will remain on the jar during storage).
- Foodsaver vacuum sealer with accessory hose port: Makes sure that your model has an attached accessory hose or a port where you can plug one in.
- wide-mouth jar sealer attachment
- 100cc oxygen absorbers: optional, but recommended to help ensure better and longer-term storage.
- Instruction labels or Sharpie marker to write instructions on lid
- Printable gift tags for Cricut machine: optional, but this Taco Soup in a Jar makes for such a great gift with the beautiful tag!
Ingredients for Making Taco Soup in a Jar
While this easy recipe uses just a handful of simple ingredients, they are not always ones that you can easily find in your local grocery store unfortunately.
Freeze-dried and dehydrated foods are becoming easier to find in certain areas, but some of these may need to be purchased online depending on where you live.
For this taco soup in a jar, you will need:
- Quick cook black beans: Some brands also label these “instant black beans”. These MUST be the quick-cook or instant variety. You cannot use regular dry beans here.
- Freeze-dried ground beef
- Dry minced onion (you can usually find this at most grocery stores or club stores like Sam’s or Costco)
- Dehydrated diced bell peppers
- Freeze-dried corn
- Tomato powder
- Beef bouillon (powdered or granules – or smash up cubes to make your own powdered)
- Taco seasoning (you can use homemade taco seasoning)
- Salt
How to Make the Taco Soup in a Jar
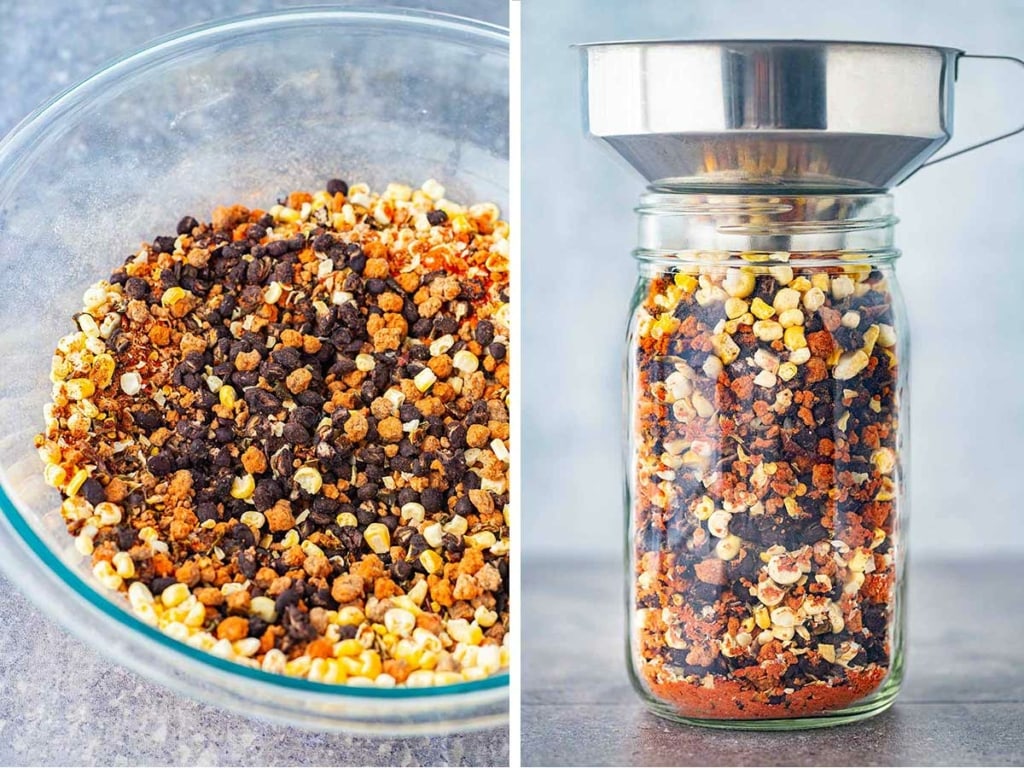
- Layer each ingredient, one at a time, into a clean and dry wide-mouth quart-sized mason jar in the order listed in the recipe.
For this recipe, the space in the jar is very tight, so if you find that layering the ingredients is still more than can fit, you can put all of the ingredients into a large bowl, mix them together, and then place the mixture into the jar.
- Place one oxygen absorber on top of the dry ingredients (if using).
- Wipe the rim of the jar to make sure it is clean of any debris or particles that would impede the vacuum seal. Then place a new lid on top of the jar.
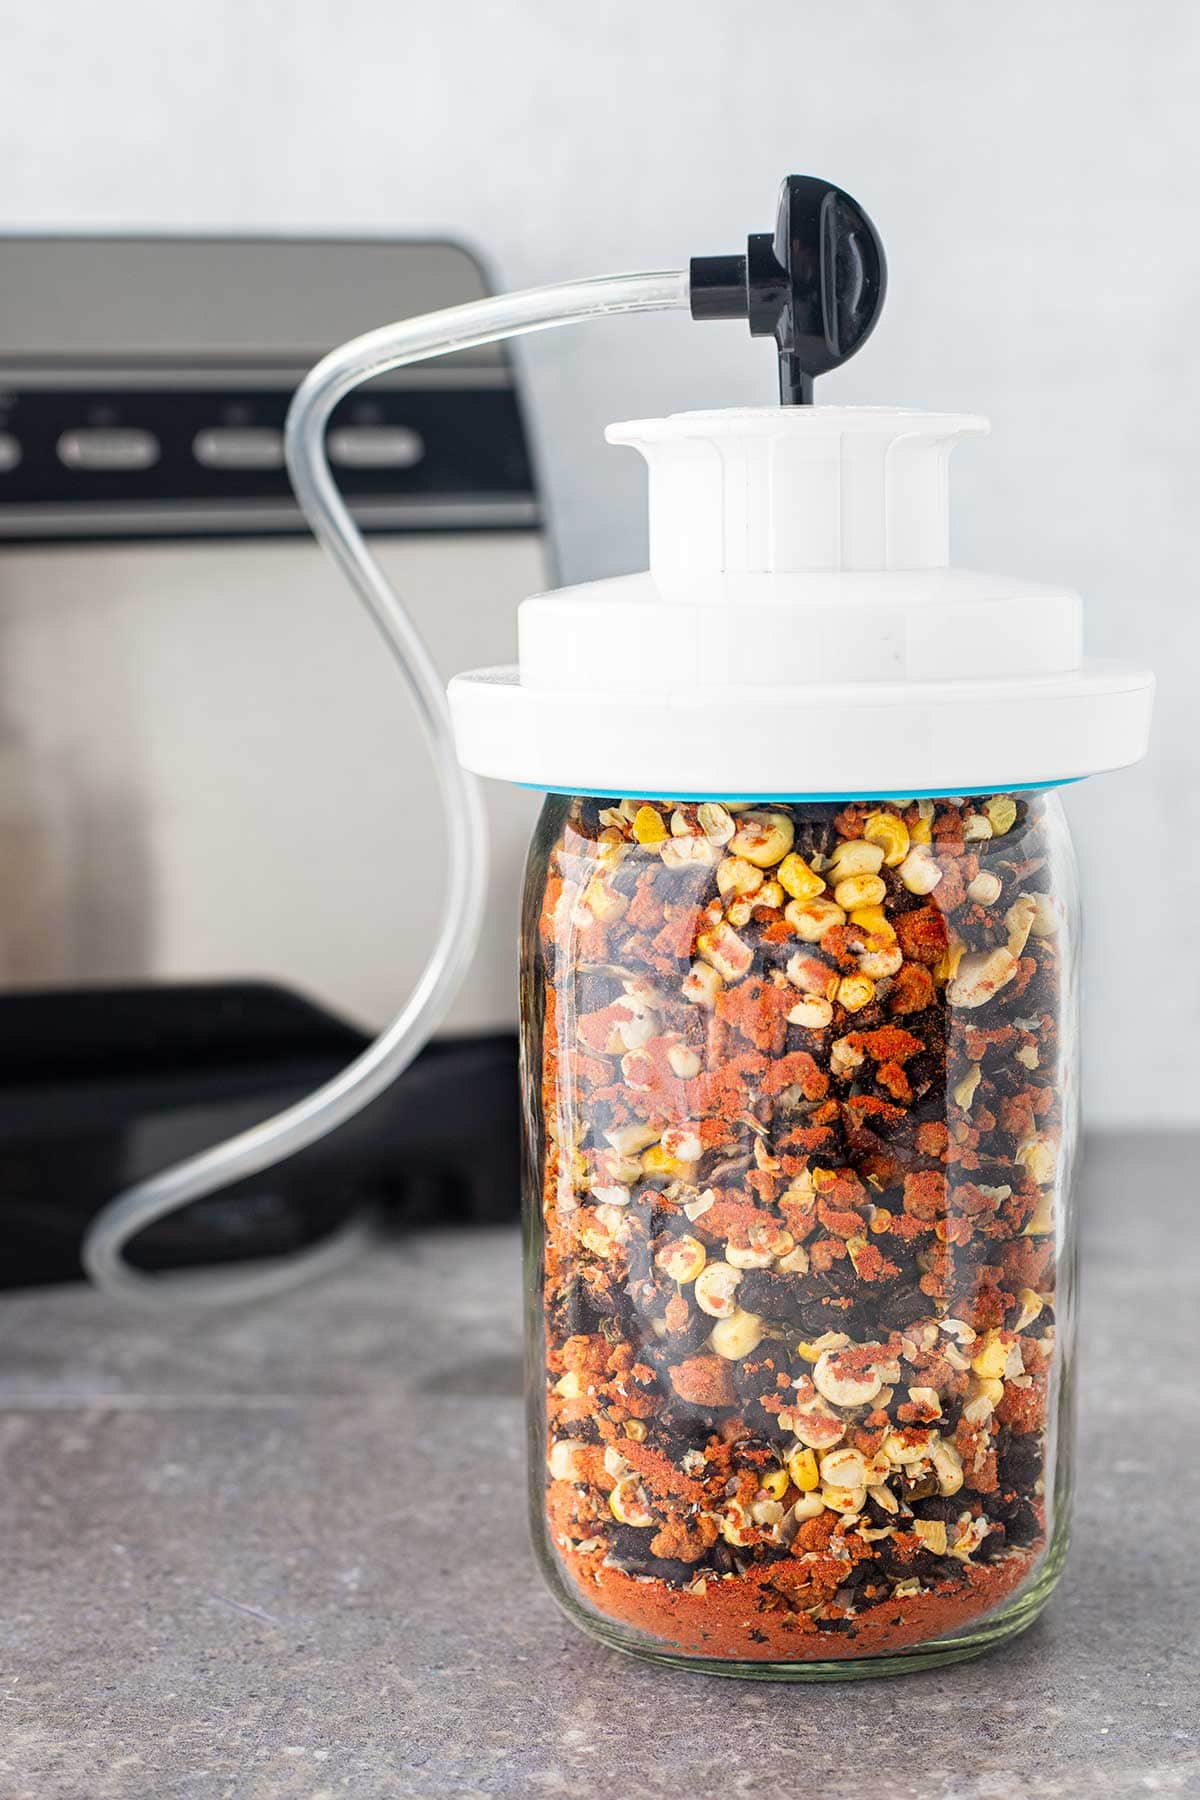
- Carefully place the wide-mouth jar attachment over the top of the jar and lid.
- Attach the accessory hose to the lid (and to the sealer if needed) and vacuum seal following the instructions for your model of vacuum sealer.
- Once done, remove the hose from the top of the jar sealer and then carefully remove the sealer attachment from off of the jar.
- Place the ring on the jar and tighten, but be careful not to over-tighten.
- Label and date your jar, and attach the instruction label to the lid or write the instructions on the lid with a permanent marker.
- Store your jar in a cool, dry location away from direct sunlight.
Storing Taco Soup in a Jar
You’ll need to store the jar(s) where it will not be jostled as this can inadvertently pop the seal.
And you should check on the seal periodically to make sure that it is holding.
Most of the time this has not been a problem for me, but occasionally I find one that loses the seal over time.
Using an oxygen absorber in combination with the vacuum sealing with the FoodSaver will help keep that seal extra tight.
Shelf Life
As long as they are properly stored and the seals hold, these jars are shelf-stable for 10+ years.
Shelf-life for the meal is usually based on the shelf life of whichever ingredient in the meal has the shortest shelf life on its own.
In this case, that is the freeze-dried meat or TVP.
Shelf life will vary a little based on the particular brand of freeze-dried meat you use, so check the label for recommended shelf life.

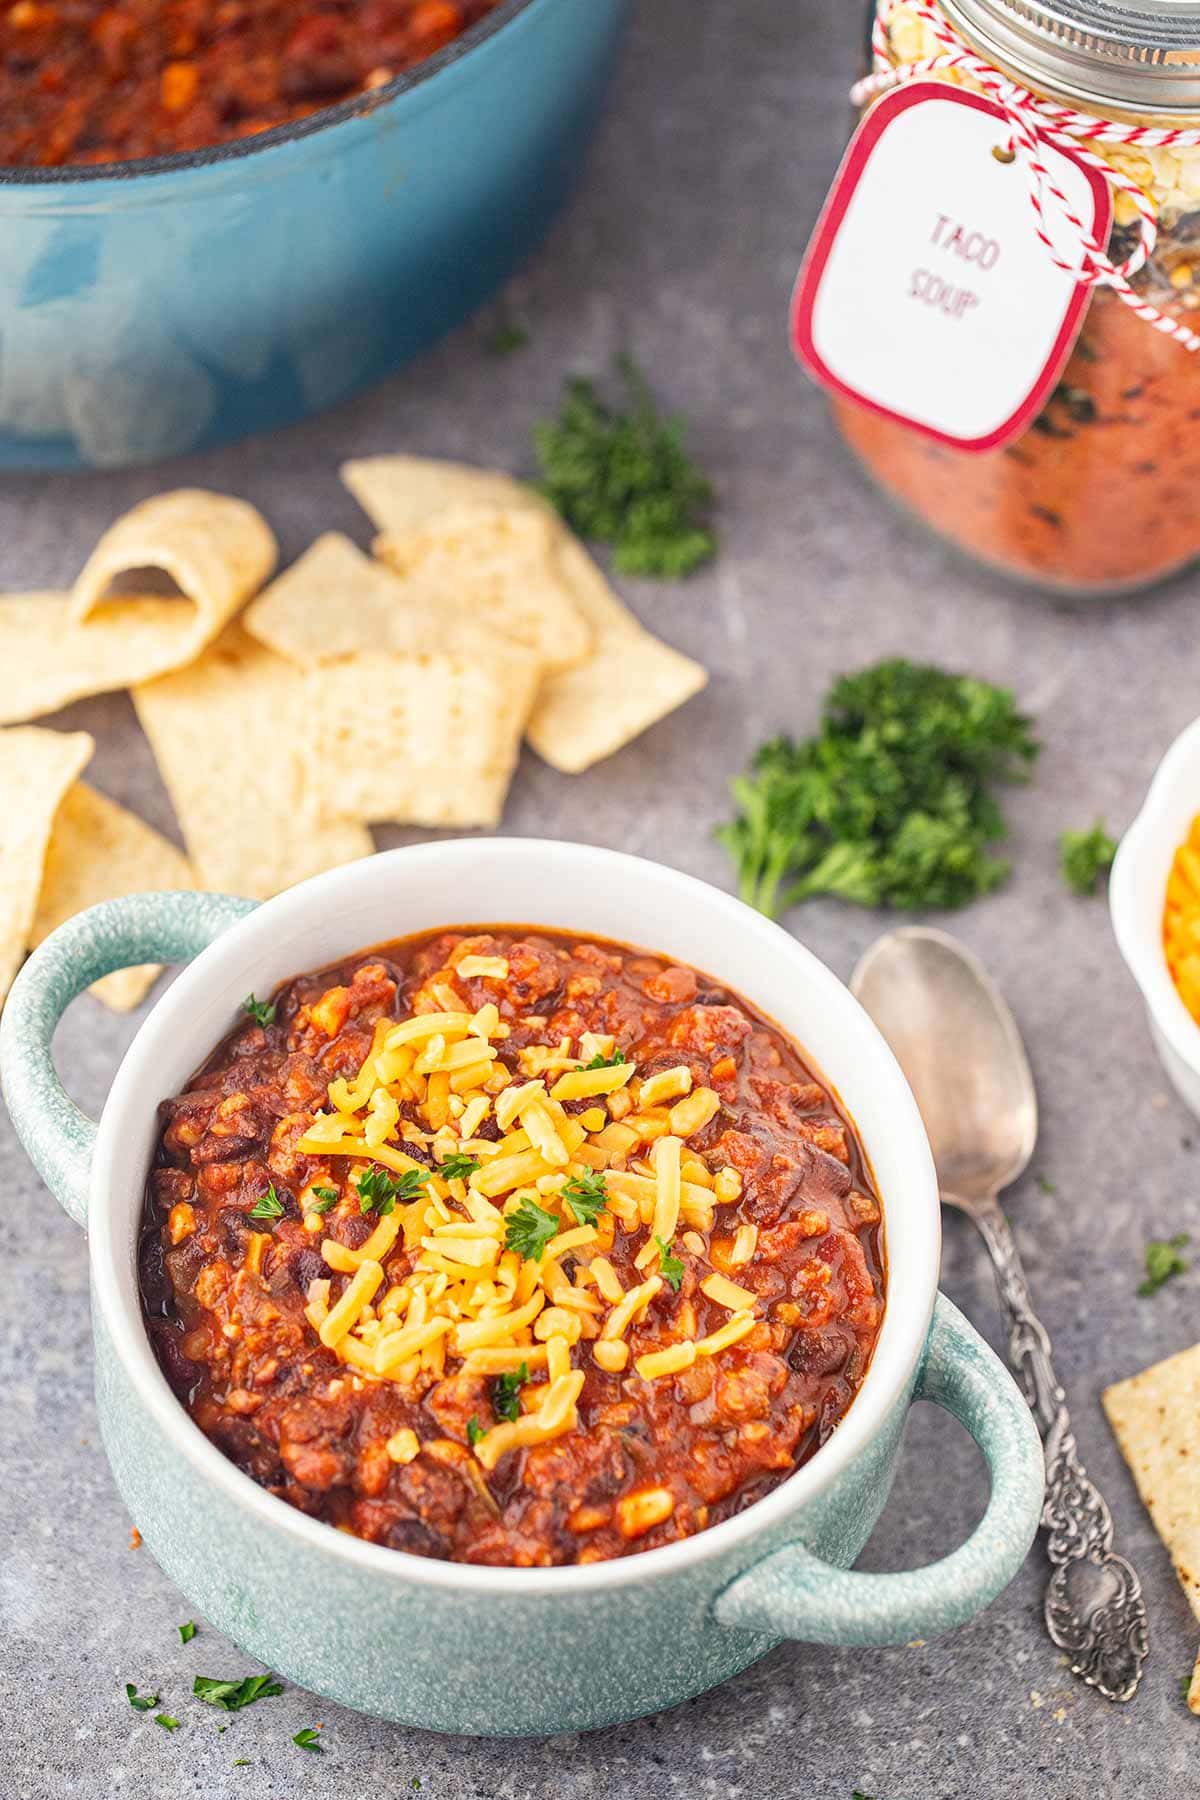
To Make Your Taco Soup (Stovetop)
This is seriously about the easiest soup out there to make!
When you’re ready to make your soup:
- Gently pry off the lid from the jar and pull out the oxygen absorber (if you used one) and discard both.
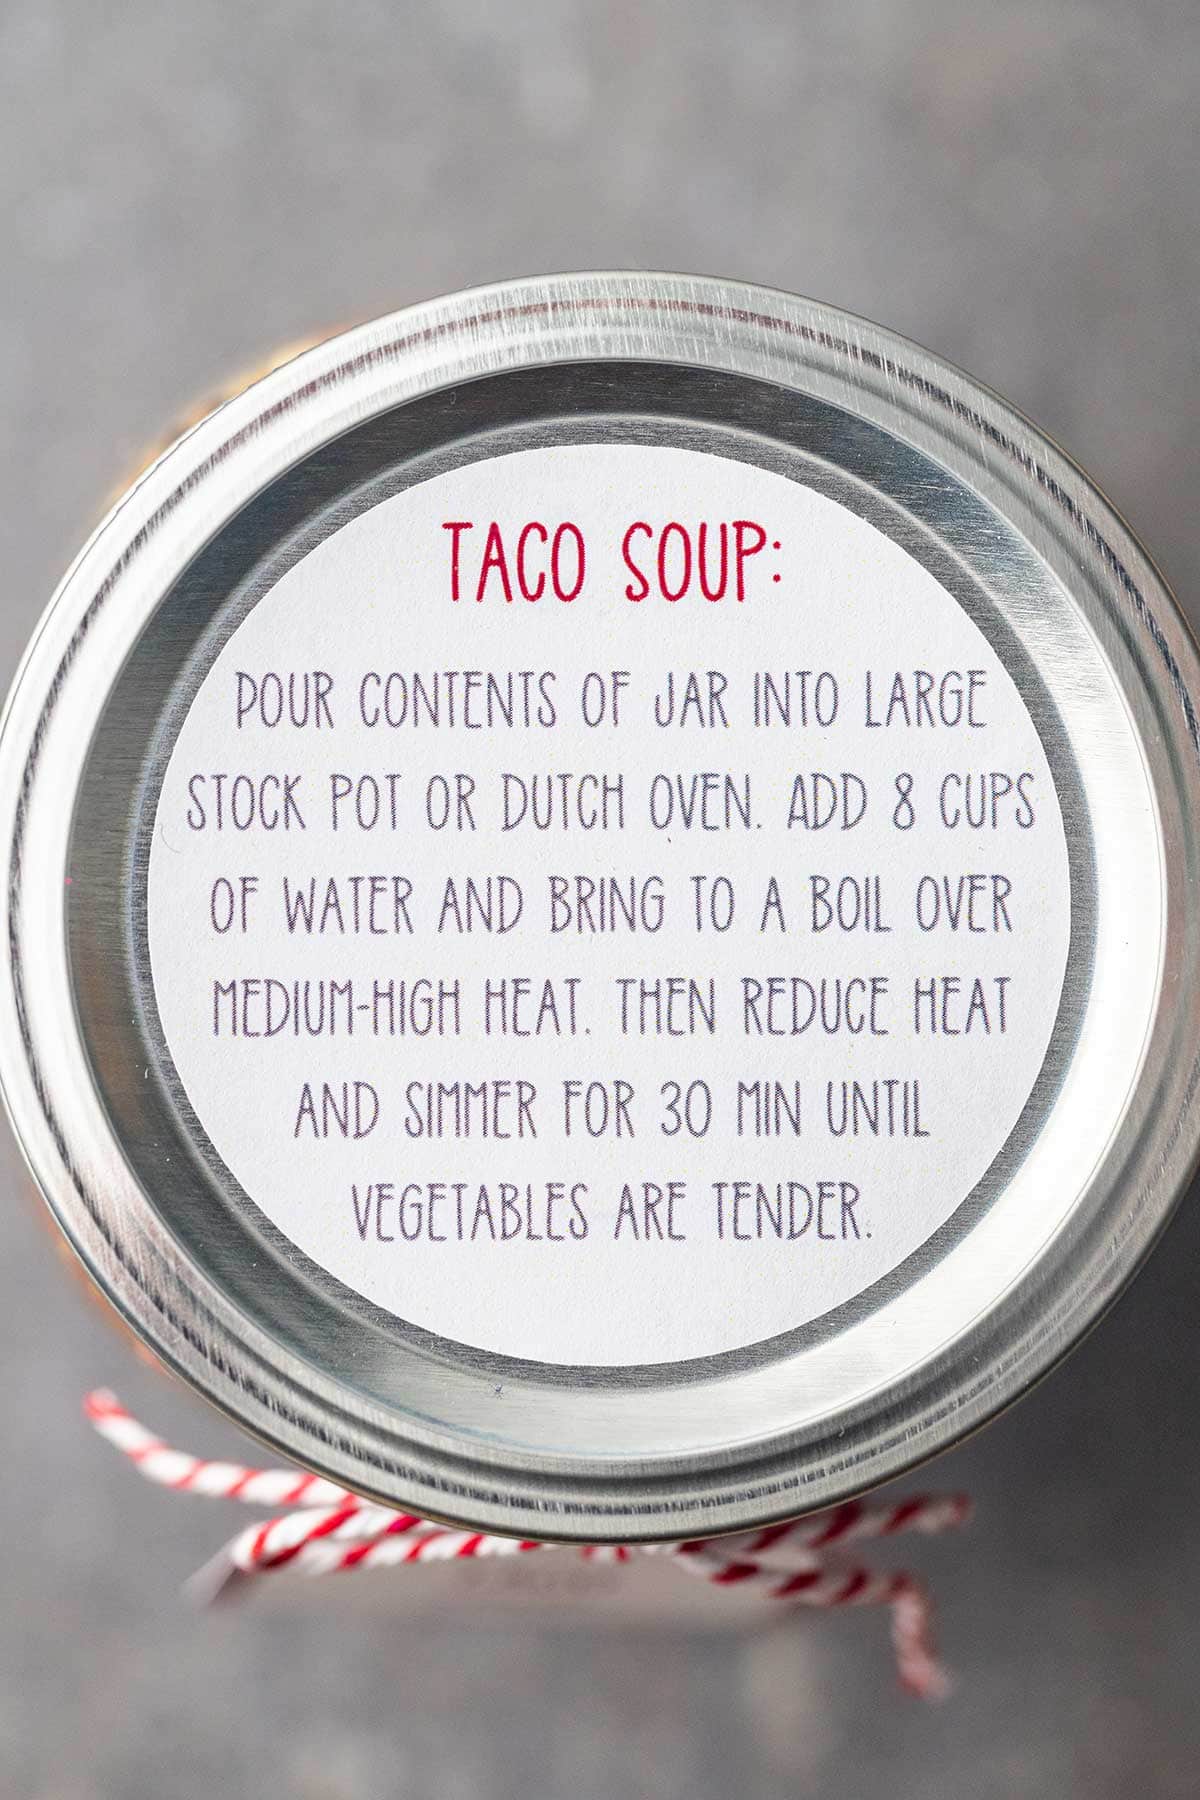
- Pour the contents of your soup in a jar into a large pot or Dutch oven and add 8 cups of water.
- Stir to mix and then bring to a boil over medium-high heat.
- Once boiling, reduce the heat and allow your soup to simmer for about 30 minutes until the corn and peppers are tender.
That’s really all there is to it!
Serve your amazing soup with tortilla chips, some shredded cheese, and top with a dollop of sour cream.
Add a squeeze of lime juice for a bright, fresh flavor burst. Or feel free to serve it with own favorite toppings!

Additional Cooking Options
Slow Cooker
To make slow cooker taco soup, pour the contents of your jar (minus the oxygen absorber) into your crock pot, add the 8 cups of water, cover, and cook on LOW for 6-8 hours or on HIGH for 2-3 hours.
Instant Pot
For Instant Pot taco soup, pour the contents of the jar (again, minus the oxygen absorber) into your liner pot (the silver pot), add 8 cups of water, stir well, cover, seal, and cook on HIGH pressure for 10 minutes. When the cook time is up, allow for a 10 minute natural pressure release and then quick-release any remaining pressure.
Taco Soup in a Jar Makes a Great Gift
These ready-to-go jars of taco soup make great gifts for family, friends, and neighbors!
My friend Amy at The Happy Scraps blog has designed printable label stickers that you can use, and she also has gift tags available that you can cut with a Cricut machine if you’d like to dress up your jars for giving as gifts!
I hope that you, and anyone you gift these too, will love this “easiest soup recipe ever” as much as me and my family do!
FAQs
Yes you can! Because it is real meat, and due to the complicated nature of the freeze-drying process, freeze-dried meats are not cheap! If you are needing to stay on a budget for these, you can substitute a vegetarian meat substitute known as TVP, or “textured vegetable protein”. It is soy-based, and made to have a similar taste and texture to the “real” stuff. For this recipe, if you decide to use TVP, I recommend using Taco Flavored TVP for best flavor.
If you are needing to keep costs down and want to avoid using TVP, another option is to make this soup recipe as written but leave out the freeze-dried meat altogether. Then, you can add fresh cooked ground beef or canned meat when you go to make the soup.
No. Quick-cook beans are ones that have been partially cooked and then dehydrated. Because of this, they don’t take nearly as much time to reconstitute and soften when used in meals.
Regular dry beans need to be soaked first, and the nature of the meals in a jar makes that hard to do. Plus, the recipe was tested and written specifically to use the quick-cook beans, so cook time and water amounts would need to be changed as well. For that reason I really recommend just sticking with the quick-cook beans here, honestly.
If you’re looking for other great meal in a jar recipes, be sure to check out these others from the blog:
- Chicken Broccoli Alfredo Meal in a Jar
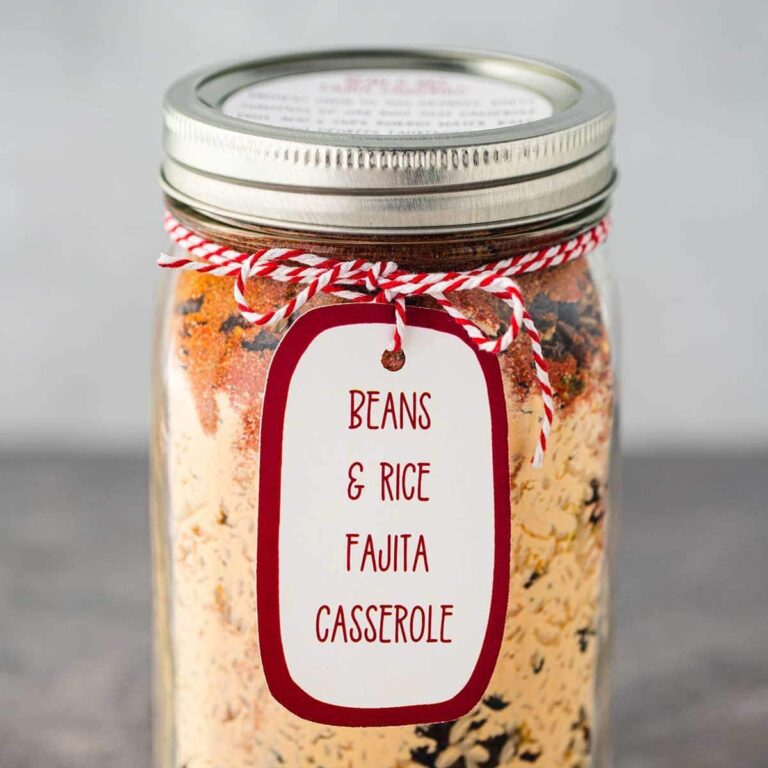
- Bean & Rice Fajita Casserole Meal in a Jar
- Beef Taco Rice Meal in a Jar
- Mac & Cheese Meal in a Jar
- Beef and Bean Stew in a Jar
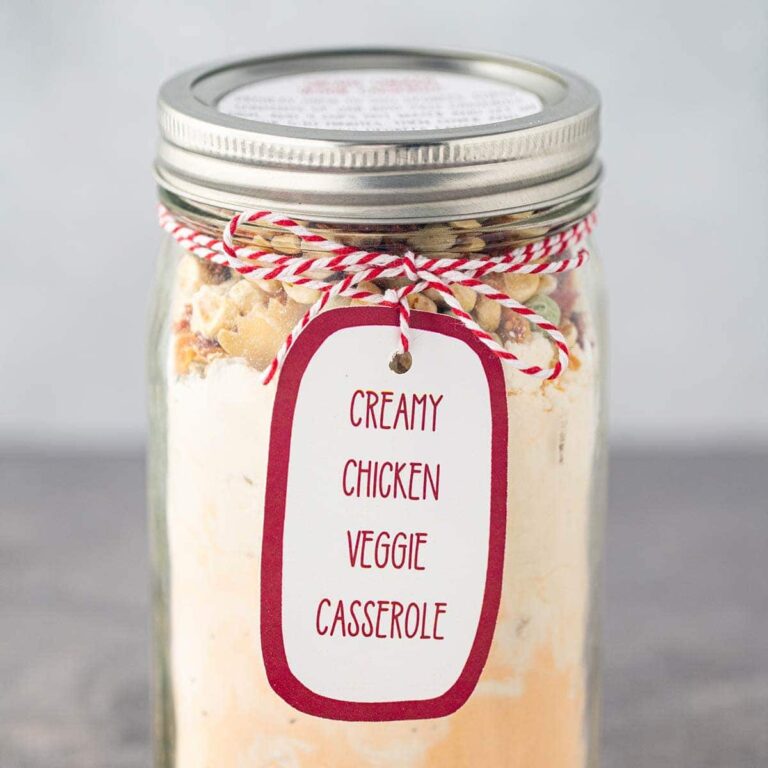
- Creamy Chicken Veggie Casserole Meal in a Jar
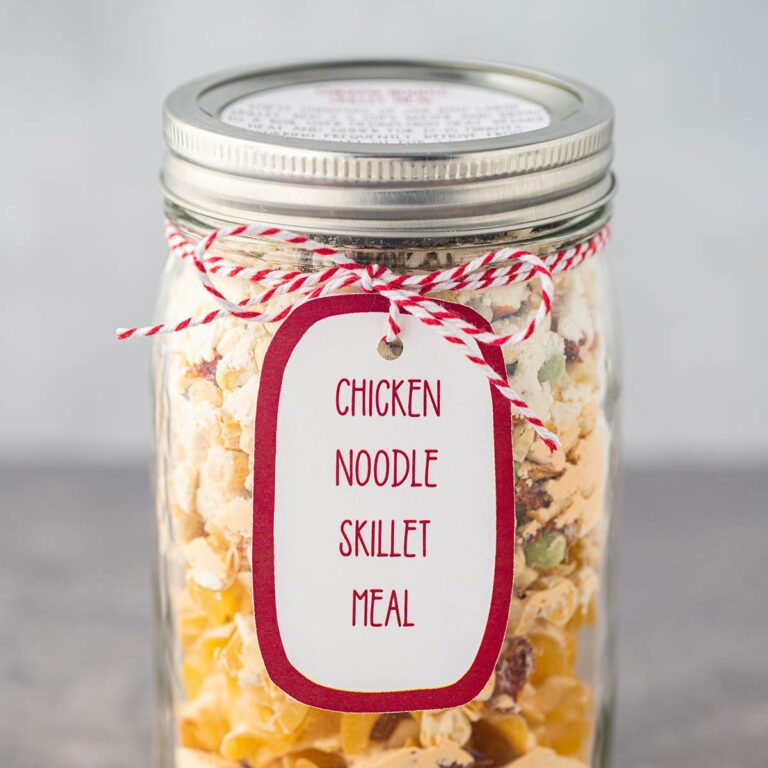
- Chicken Noodle Skillet Meal in a Jar
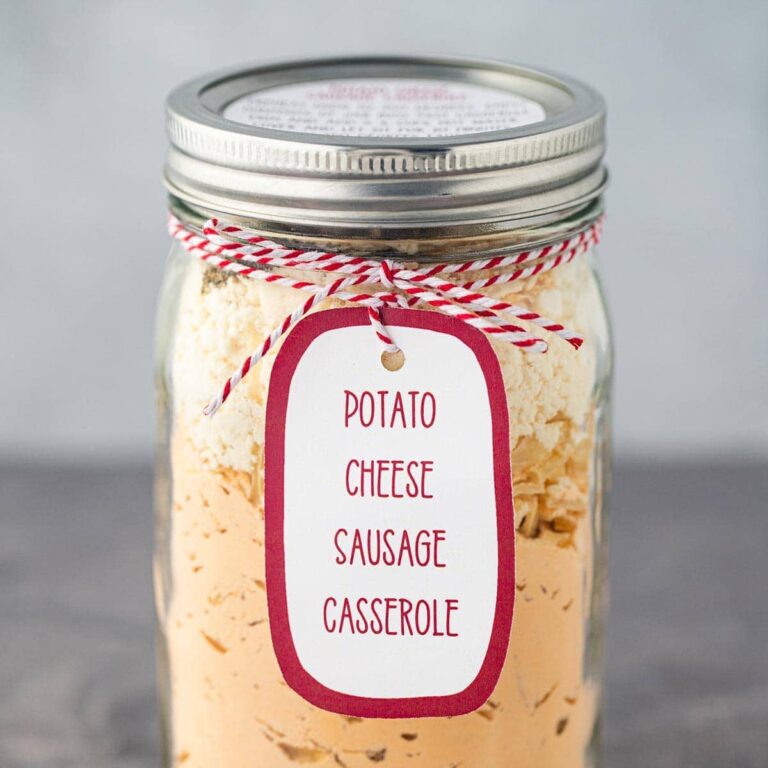
- Potato Sausage Cheese Casserole in a Jar
Taco Soup in a Jar
EQUIPMENT
INGREDIENTS
- 2 cups quick-cook black beans
- 1 cup freeze-dried ground beef
- 2 tablespoons dehydrated minced onion
- 2 tablespoons taco seasoning
- 1 tablespoon beef bouillon
- 1 teaspoon salt
- 1/3 cup tomato powder
- 1/3 cup dehydrated diced bell peppers
- 3/4 cup freeze-dried corn
INSTRUCTIONS
- Place items in layers into mason jar in the following order: beans, beef, onion, seasonings, tomato powder, bell peppers, then corn. Shake to settle contents.
- Lay oxygen absorber on top of ingredients (optional). Wipe off rim of mason jar to allow for a good vacuum seal with the lid.
- Place new canning lid on top of jar. Using wide-mouth attachment for a FoodSaver, vacuum seal the lid onto jar following instructions from your FoodSaver manual.
- Once seal is done, remove vacuum attachment and put ring on. Tighten by hand, but don’t over tighten.
- Label and date. Store in cool, dry location.
To cook:
- Empty contents of jar (minus oxygen packet if present) into large stock pot or dutch oven. Add 8 cups of water and bring to a boil over medium-high heat. Reduce heat and simmer for 30 minutes until vegetables are tender.


I am brand new to jar meals and canning as a whole. I do not have a vacuum sealer and was wondering if water canning would work with the oxygen absorbers? I have a big boiling pot and jar grippers.
These meals are not designed for water-bath canning. (Water bath canning is for wet foods only.) These meals are for dry sealing (vacuum) only. If you don’t have a vacuum sealer, you can use just an oxygen absorber. You’ll want to go with a slightly higher rated one, but it’s totally doable. Place your oxygen absorber on the top of the jar contents, then place a new lid on top and screw on the ring. You’ll need to work quickly, as the oxygen absorbers begin to work immediately upon unsealing. After you have the lid and ring on the jar, give it a few hours and then check, but you should see that the center of the lid has sucked down and when you press lightly on it, it will not flex up/down or make a clicking noise.
Thank you, I have been looking for recipes to use my dried/freeze dried foods in, and I have dry black beans, not quick cook, so I’ll just cook them separately.
it does not fit into the jar. it overflows
This was good and easy to do. However, it was way too salty for us. I’ll definitely make it again but either half the salt or leave it out altogether and salt when eat it.
Absolutely feel free to leave out the salt, especially if you use a taco seasoning that already has salt in it.