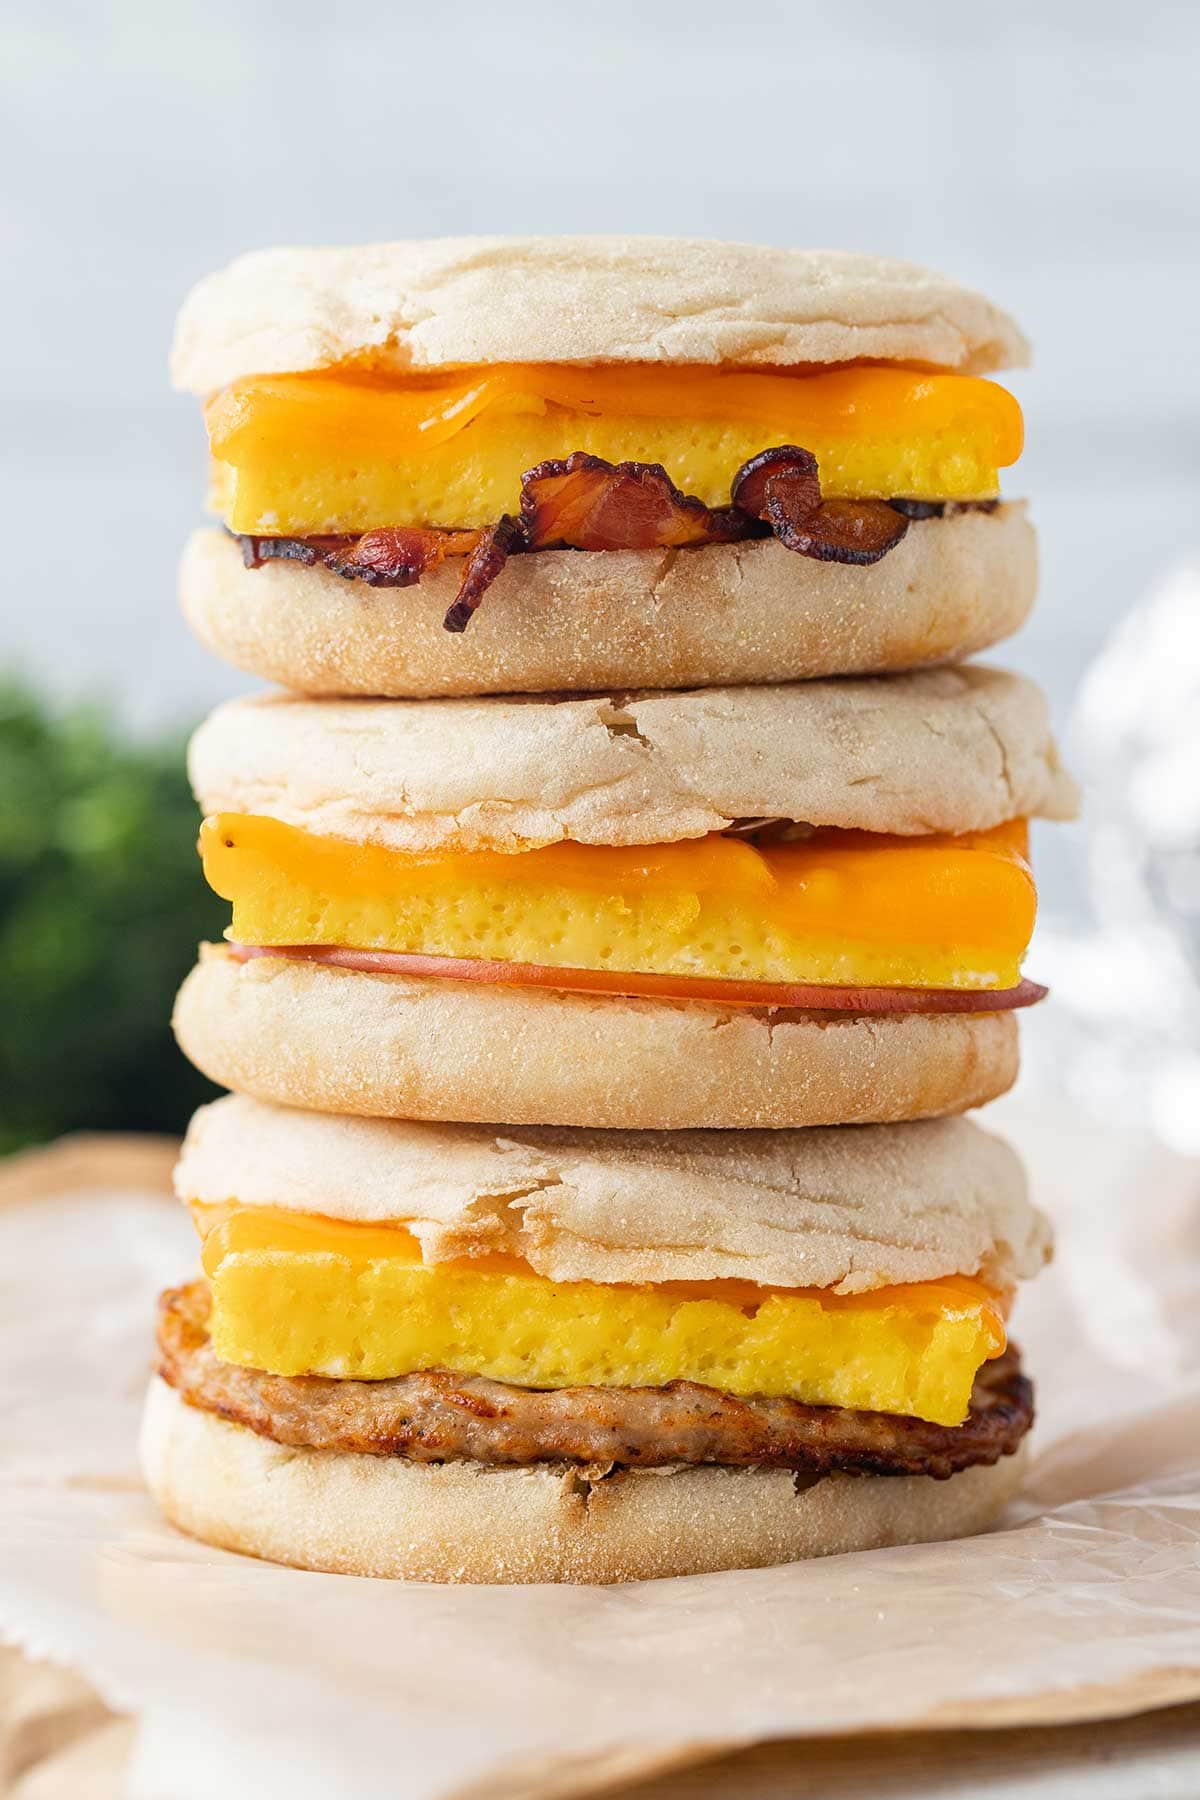
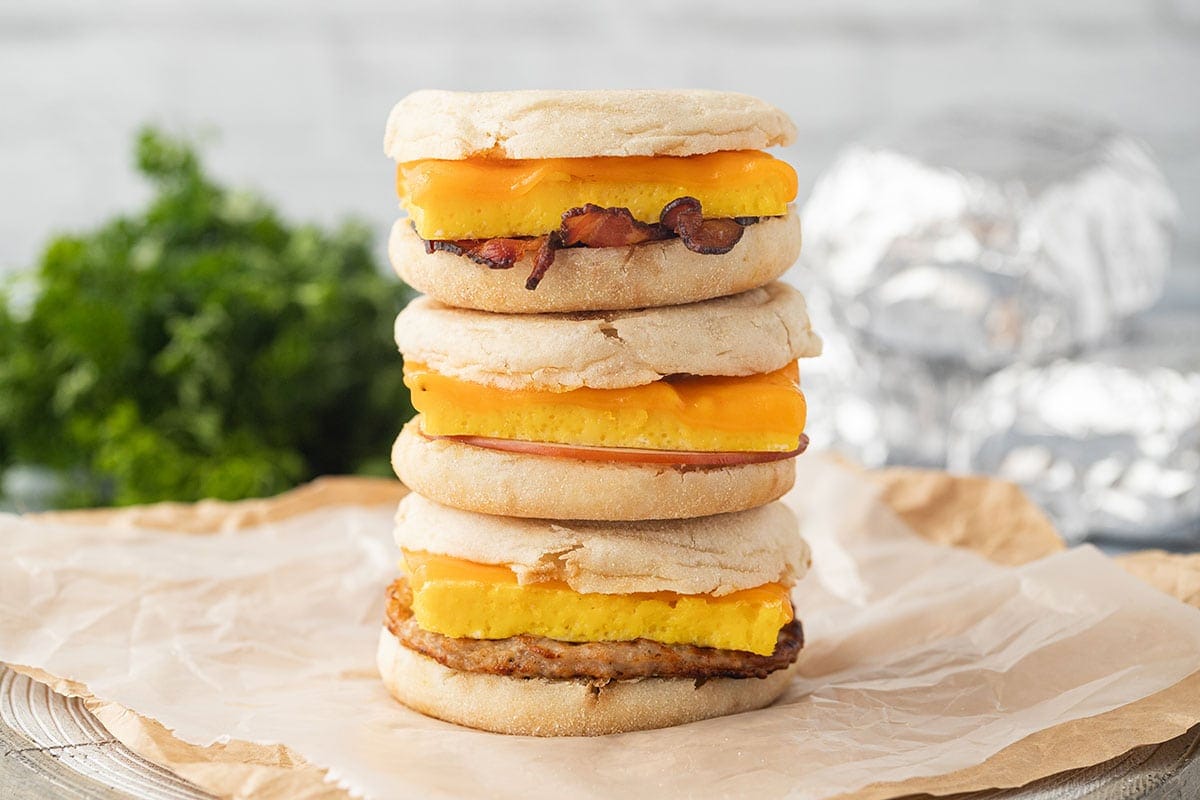
Freezer Breakfast Sandwiches
Made with baked eggs, melted cheese and various breakfast meats all stacked together on hearty English muffins, these make-ahead Freezer Breakfast Sandwiches are an easy, delicious option to get a hot breakfast on the table quickly on busy mornings!
Some of my most favorite freezer meals are the ones I make for breakfasts. And these make-ahead Freezer Breakfast Sandwiches are usually at the very top of my list! They are incredibly easy to make, easy to freeze, easy to reheat, and they save me so much time (and my sanity) on busy mornings. They are infinitely customizable, which is a plus when you have a family with differing ideas about what tastes “good”. Ha ha!
Plus, I have yet to find a family member, be it adult or child, who doesn’t like these. And some days that is a miraculous win in my book!
Freezer Breakfast Sandwiches
I love making these sandwiches ahead of time because they are quick and easy to put together. I can make a lot of them in a very short amount of time and without much work. And I am all about big returns with minimal amounts of work!
They are also VERY filling and can keep my voracious kids full for at least, oh, two hours or so. The same cannot be said for cold cereal, which usually never fills them up because by the time they are finished eating a bowl they are hungry again.
We’ve also like to use these as an easy breakfast option for taking on road trips, camping trips, and cabin trips. Having them made up ahead of time saves so much work and means less overall ingredients we have to take with us, which makes for easier planning and less space needed in packing.
How to Make Freezer Breakfast Sandwiches
1. Prepare the Eggs
My personal favorite way to do eggs for these sandwiches is by baking them in a 9×13 pan in the oven and then cutting them into squares for the sandwiches. This method allows you to make 12 egg portions per dish, and you can usually get 2 dishes side by side in the oven, so you can make a total of 24 in one round of baking. Plus, this method is very “hands off”.
To make the eggs this way, you simply need to whisk together your eggs, some milk or cream, salt and pepper and any other seasonings you want (I highly recommend dried basil – yum!), then pour that mixture into a 9×13 baking dish or pan that you have sprayed or greased.
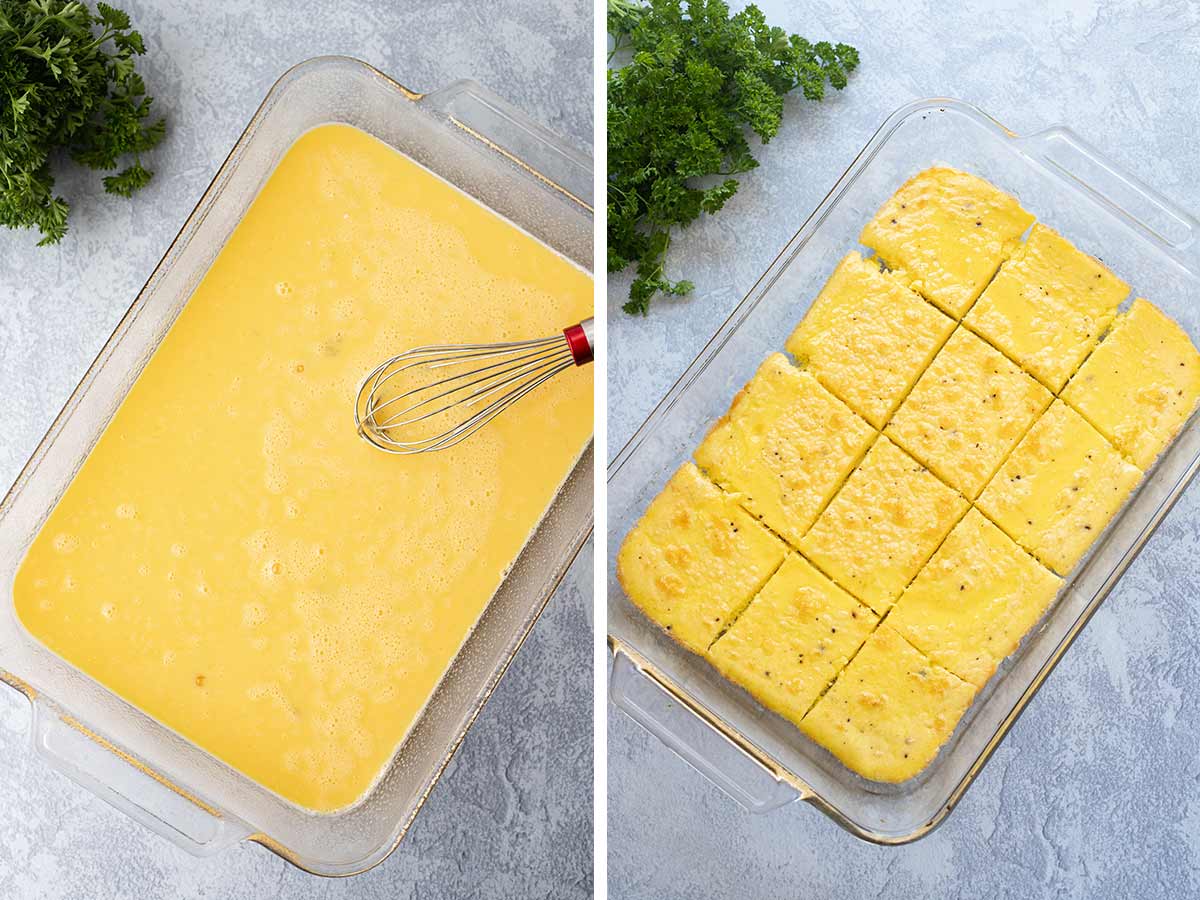
Bake the eggs at 350 degrees Fahrenheit for 20-22 minutes until fully set. Be careful not to overcook them as they will cook more when you reheat the sandwiches, and no one likes rubbery overcooked eggs.
Allow the eggs to cool before cutting them into 12 squares. Putting warm eggs on the sandwiches will start to melt the cheese slices and will make the sandwiches take longer to freeze, which increases the risk of developing ice crystals, so be sure to let them cool first.
2. Assemble the Sandwiches
Start by separating the halves of your English muffins and laying one half of each out on the table. I like to keep the two together, so I actually lay both halves together next to each other and only assemble on one of the two, but you don’t have to keep them together.
Top each English muffin with the breakfast meat of your choice – bacon, ham, Canadian bacon, turkey bacon, or sausage patties. Our default is always sausage patties, and I buy them already cooked and frozen to save time. My family really likes the maple-flavored ones! But we occasionally change up the meat choices for variety.
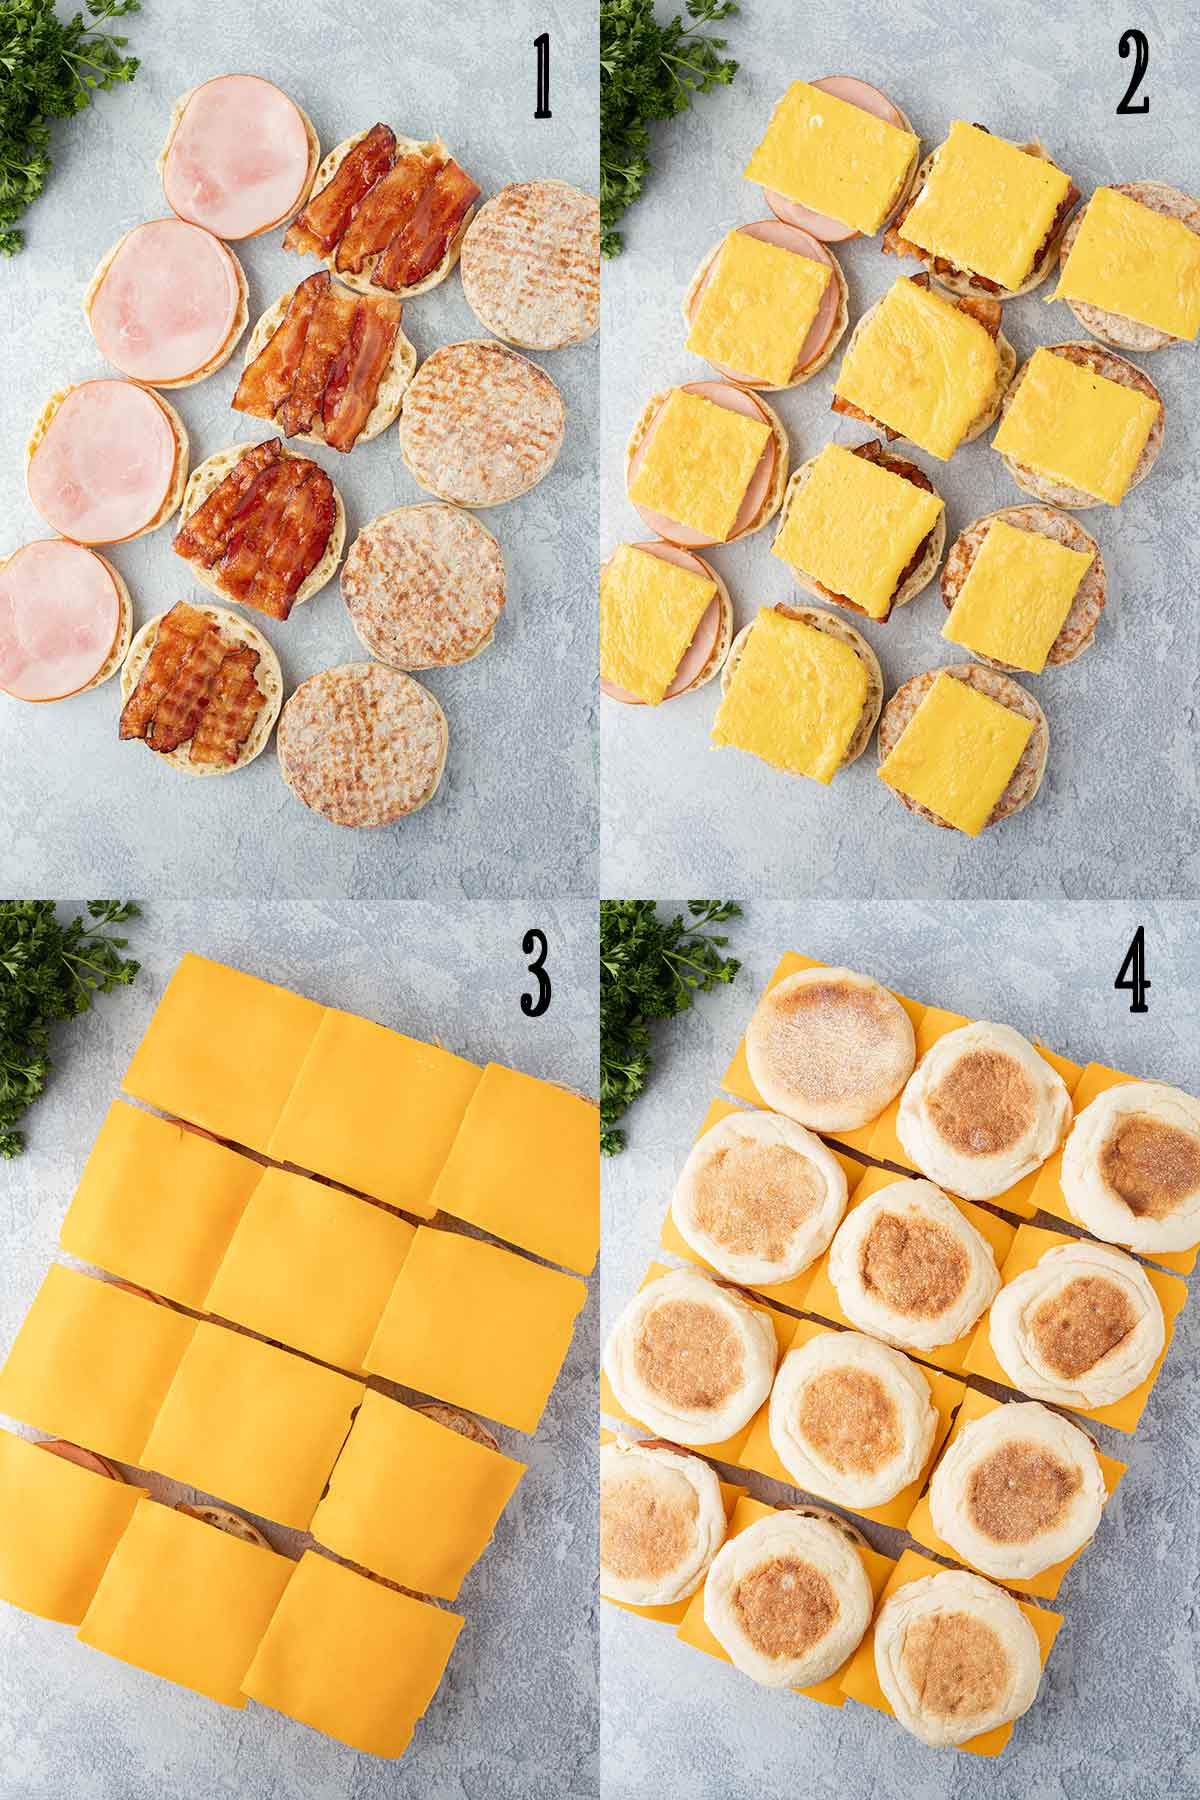
Add one square of the baked eggs on top of the meat, and then top that with a slice of cheese (unless you used shredded cheese in your eggs). Put the other half of the English muffin on top, and there you go.
3. Wrap and Freeze
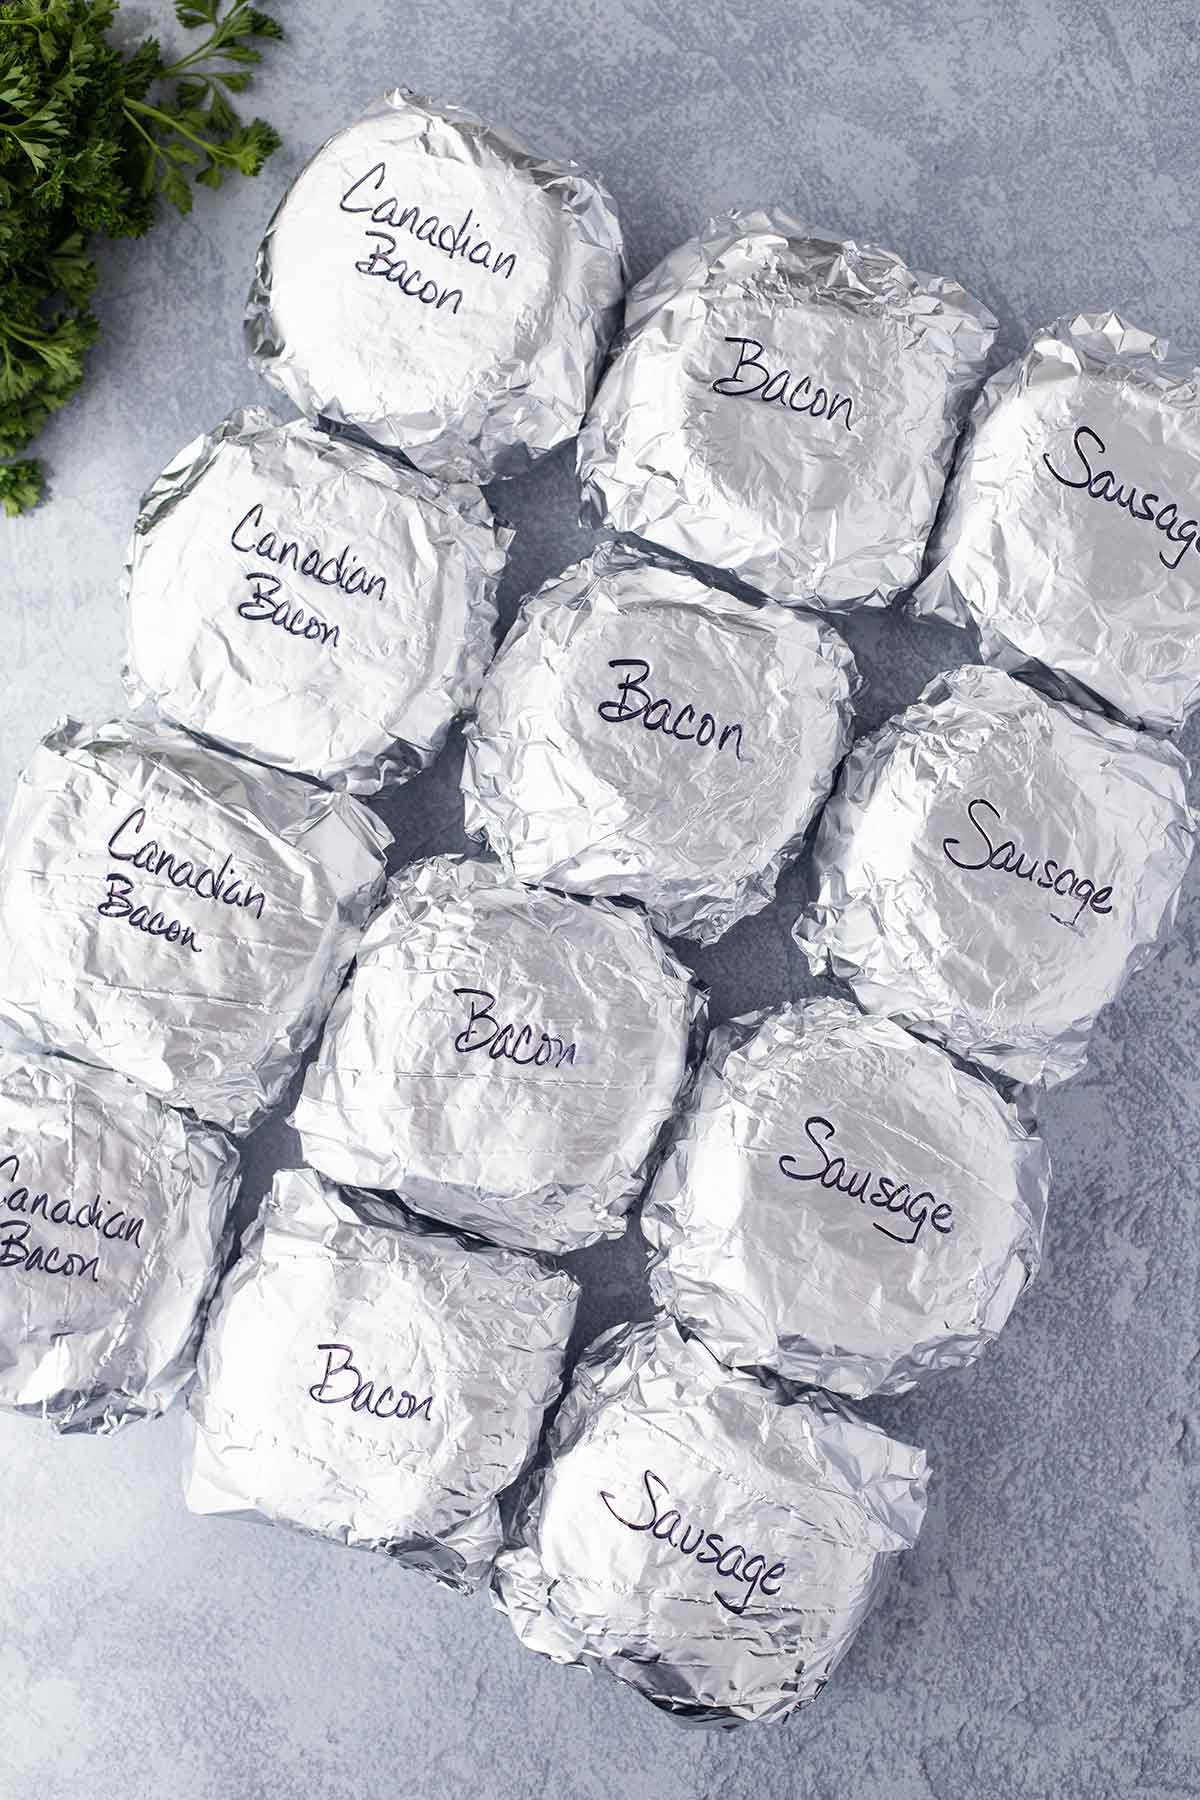
Wrap each sandwich individually in a square of aluminum foil or freezer paper. If you have used a variety of meat options on your sandwiches, be sure to write which is which on each sandwich. Then place the wrapped sandwiches in a gallon size ziptop freezer bag. Be sure to label the bag with the contents and date, and then place in the freezer.
The breakfast sandwiches will keep for 3-6 months in the freezer, but we find that we use them up long before that. 😉
How to Reheat Your Frozen Breakfast Sandwiches
The easiest (and quickest) way to heat your sandwiches for eating is in the microwave.
From frozen: Remove the aluminum foil (if used), and wrap your frozen sandwich in a single layer of paper towel. Microwave for 1 minute on 50% power. Then microwave for 45-60 seconds on full power, until heated through.
From thawed: Remove sandwiches from freezer and place in refrigerator overnight to thaw. Once thawed, remove aluminum foil (if used), wrap in a paper towel and microwave for about 35-40 seconds on full power, until heated through.
Large batch: If you’re needing to heat a lot of sandwiches at once, I recommend doing that in the oven. In this case, you’ll want to keep them in their aluminum foil wrappings. Place frozen wrapped sandwiches on a baking sheet. Bake in a 400 degree Fahrenheit oven for about 20 minutes, then remove the foil, place sandwiches carefully back on the baking sheet, and bake for 10 more minutes unwrapped.
Substitutions and Options
There are so many ways to customize your sandwiches, and the varieties are endless! Here are a few things you can try:
- For the “sandwich” itself: Substitute biscuits or bagels for the English muffins. We’ve even found some pita bread circles or bagel thins to try!
- For the eggs: Add diced peppers and onions for a “Denver omelet” style (you could even add salsa after you heat your sandwich), or add other veggies, mushrooms, etc. Use fried eggs instead of baked, for a different taste and texture. Add shredded cheese directly to the eggs and omit the sliced cheese (less messy when reheating in the microwave). If you want round eggs, check out this video on my YouTube channel for instructions on how to make round eggs on a griddle or stovetop using canning rings (trust me, it’s a lot easier to show it than it is to tell how to do it)!
- For healthier options: Use egg whites instead of scrambled whole eggs. Substitute turkey sausage or turkey bacon for your meat. Omit cheese if needed, or go with a low fat option. You could even add cottage cheese into your baked eggs. Go for whole-wheat English muffins for added fiber and a great source of whole grains.
- For keto breakfast sandwiches: Make these using keto biscuits OR leave the “bread” part out all together, double the amount of eggs you bake, and sandwich your meat and cheese between two pieces of egg as the “sandwich”.
- For gluten-free and/or dairy-free: You can substitute your favorite gluten-free bread or use GF pita, Ezequiel bread, cloud bread, or GF English muffins. You can make them dairy-free by omitting the cheese, and use water or coconut milk for the eggs (or leave it out entirely – it’s really there just as a protection for the egg proteins and the eggs can be made without it).
A note about options for baking the eggs:
Just this last week, after I had already shot all of the photos for this post, I finally got a chance to try out a new method for the eggs! Amazon sells “muffin top” pans that you can use to bake your eggs in the oven and still get round-shaped egg portions without much extra fuss! My family got a kick out of them, and I’ll probably do our eggs like this often, just because hey, round eggs!
I tried out this Chicago Metallic Muffin Top Pan, and I also used these Baker Depot silicone trays (place them on a baking sheet for stability) – they both make eggs that were the PERFECT size! You can even do just a straight egg in them (without scrambling). I really liked the results!
IMPORTANT NOTE: If you go this route, you’ll want to bake at 350 degrees Fahrenheit for 10-12 minutes only (they are thinner and have more surface area so they cook faster than in a 9×13 pan).
Be sure to check out some of the other make-ahead freezer meal breakfast options available here on the site! Here are some of my kids’ favorites:
- Make-Ahead Muffin Mix
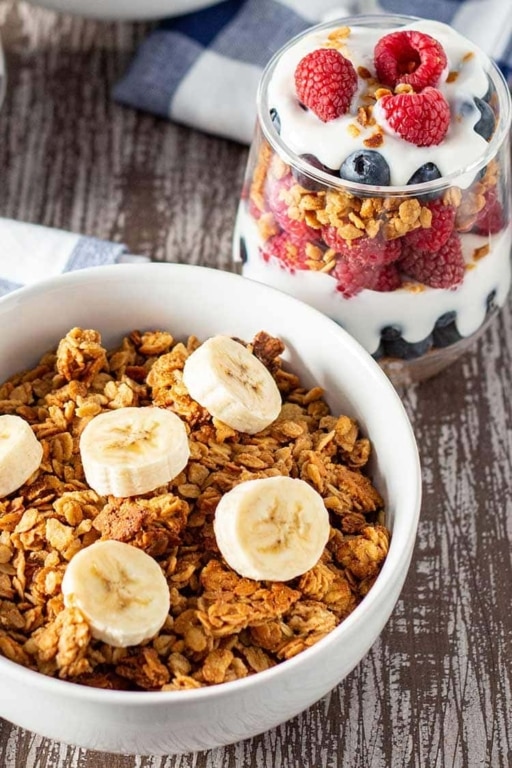
- Easy Granola Parfaits
- Easy Breakfast Pastries (<-They would happily eat these every morning if I let them!)
Freezer Breakfast Sandwiches
INGREDIENTS
- 12 eggs
- 1/4 cup milk or heavy cream
- 1 teaspoon salt
- 1/2 teaspoon dried basil optional
- 1/4 teaspoon black pepper
- 12 English muffins
- 12 precooked sausage patties or slices of Canadiam bacon or ham, or 24 strips of cooked bacon
- 12 slices cheddar cheese or 2 cups shredded cheddar cheese for eggs
INSTRUCTIONS
- Preheat oven to 350 degrees Fahrenheit.
- Whisk together eggs, milk or cream, salt, pepper, and basil (optional) in medium bowl. Pour into 9x13 baking dish that has been prepared with non-stick cooking spray.
- Bake for 20-22 minutes until center of eggs is fully set (be careful to not overcook).
- Remove eggs from oven and cool. Once cooled, cut the eggs into 12 squares.
- Separate the halves of the English muffins and line up one half of each on a counter or table surface.
- Place one serving of your chosen meat (either one frozen sausage patty, a slice of Canadian bacon or ham, or two strips of bacon cut in half) on each of 12 muffin halves.
- Top each with one square of eggs and then a slice of cheese. Then place remaining halves of the muffins on top.
- Wrap each sandwich individually in aluminum foil or freezer paper. Be sure to label what type of meat is included.
- Place wrapped sandwiches in a large gallon-size ziptop freeze bag. Label and date the bag, then place into freezer.
To reheat from frozen:
- Remove aluminum foil or freezer paper from frozen sandwich.
- Wrap loosely in one layer of paper towel, then microwave for 1 minute on 50% power, followed by 45-60 seconds on full power.
To reheat from thawed:
- Remove frozen sandwich(es) from freezer and place into refrigerator overnight to thaw.
- Once thawed, remove aluminum foil or freezer paper from sandwich.
- Wrap loosely in one layer of paper towel, then microwave for 35-45 seconds on full power until heated through.
To reheat a large batch (each sandwich wrapped in aluminum foil):
- Place frozen wrapped sandwiches on a baking sheet.
- Bake in a 400 degree Fahrenheit oven for about 20 minutes, then remove the foil, place sandwiches carefully back on the baking sheet, and bake for 10 more minutes unwrapped.


Love this idea and I’m going to do it! What sausage patties do you use? I can’t find many patties in the stores here and the few I have found didn’t taste all that great. I’d love to find some available here in Canada that taste as good as the McDonald’s sausage patties!
I use the Great Value ones from Walmart.
i do this a least twice a year to stock the freezer. Making about 100 at a time. Sometimes i use grand biscuits,or homemade. Sometimes english muffins, that i toast before assembly. I find i only have to cook the eggs around 11-12 mins. Then i sprinkle cheese on top, cook for a few more mins. til cheese melts.
Do you cook the sausage patties at all before assembling the sandwich or do you take the frozen patty directly from the package to the muffin?? Thanks!
The sausage patties I use are already fully cooked before they are frozen, so I put them on frozen since the sandwiches are just going right back in the freezer in a few minutes.
I made these and they are very good, my only problem was when heated in the microwave from fridge not frozen the cheese dripped all out. Any suggestions ? Thx
I mix the cheese in with the eggs now when I bake them. No more dripping cheese (my husband hates the drippy cheese but some folks really like it so I left the instructions as is. I need to do an update because I bake the eggs in round silicone molds now too. 😉