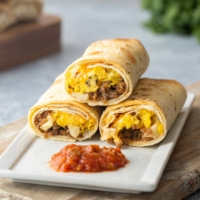
Make-Ahead Breakfast Burritos (Freezer-Friendly)
Busy mornings are no match for these easy Make-Ahead Breakfast Burritos! Make up a batch of these freezer burritos for a quick, delicious, healthy breakfast!
Rise and Shine with Make-Ahead Breakfast Burritos
Are you tired of stumbling into the kitchen in the morning, half-asleep, and desperately searching for something to eat? Well, my friend, it’s time to rise and shine with make-ahead freezer breakfast burritos!
When it comes to easy breakfasts, these freezer-friendly breakfast burritos are right at the top of my list, along with my favorite Freezer Breakfast Sandwiches!
These little bundles of savory breakfast joy are a morning game-changer! Why, you ask?
They’re a time-saver: With a little bit of prep work, you can have a week’s worth of easy breakfasts ready to go. No more scrambling (pun intended) to make something in the morning when you’re barely awake. Just grab a frozen breakfast burrito from the freezer, heat it up, and voila! Breakfast is served.
They’re customizable: You’re the boss of your breakfast burrito kingdom. You get to choose the ingredients that will make your taste buds sing. You can create a plethora of make-ahead breakfasts that suit your preferences perfectly.
They’re portable: Need to eat on the go? No problemo! These easy breakfast burritos are the ultimate grab-and-go meal. Wrap one up, toss it in your bag, and you’re ready to conquer the day.

Ingredients – The Building Blocks of Burrito Bliss
When it comes to making the best freezer breakfast burrito, the ingredient options are as vast as the morning sky!
For this hearty breakfast version, we’re going with some basic favorites:
- scrambled eggs – You can flavor these however you like, from mild to spicy! You can also go with just egg whites here, too.
- breakfast sausage – Browned and drained loose breakfast sausage is classic, but you can also use precooked frozen breakfast links, too.
- hash browns – We like diced hashbrowns, either regular or southern-style (with onion and bell pepper added). Since you will be freezing the burritos, and the potatoes are already parboiled, there’s no need to fry them up first, but you can if you want to add a bit more depth of flavor.
- shredded cheddar cheese – Cheddar is the classic choice here, and you could go with sharp, mild, or even smoked. Colby-jack is fun, or add some flair with a fiesta-style or Mexican blend.
- flour tortillas – Burrito size, in a brand that is fairly sturdy. For best results, use the freshest tortillas you can get, and only pull a few out of the package at a time to avoid them becoming stiff or dry.
If you find that your flour tortilla is a little stiff or prone to cracking, you can place it between two damp paper towels and microwave it for about 10 seconds to help soften it.
Assembly – Zen and the Art of Burrito Rolling
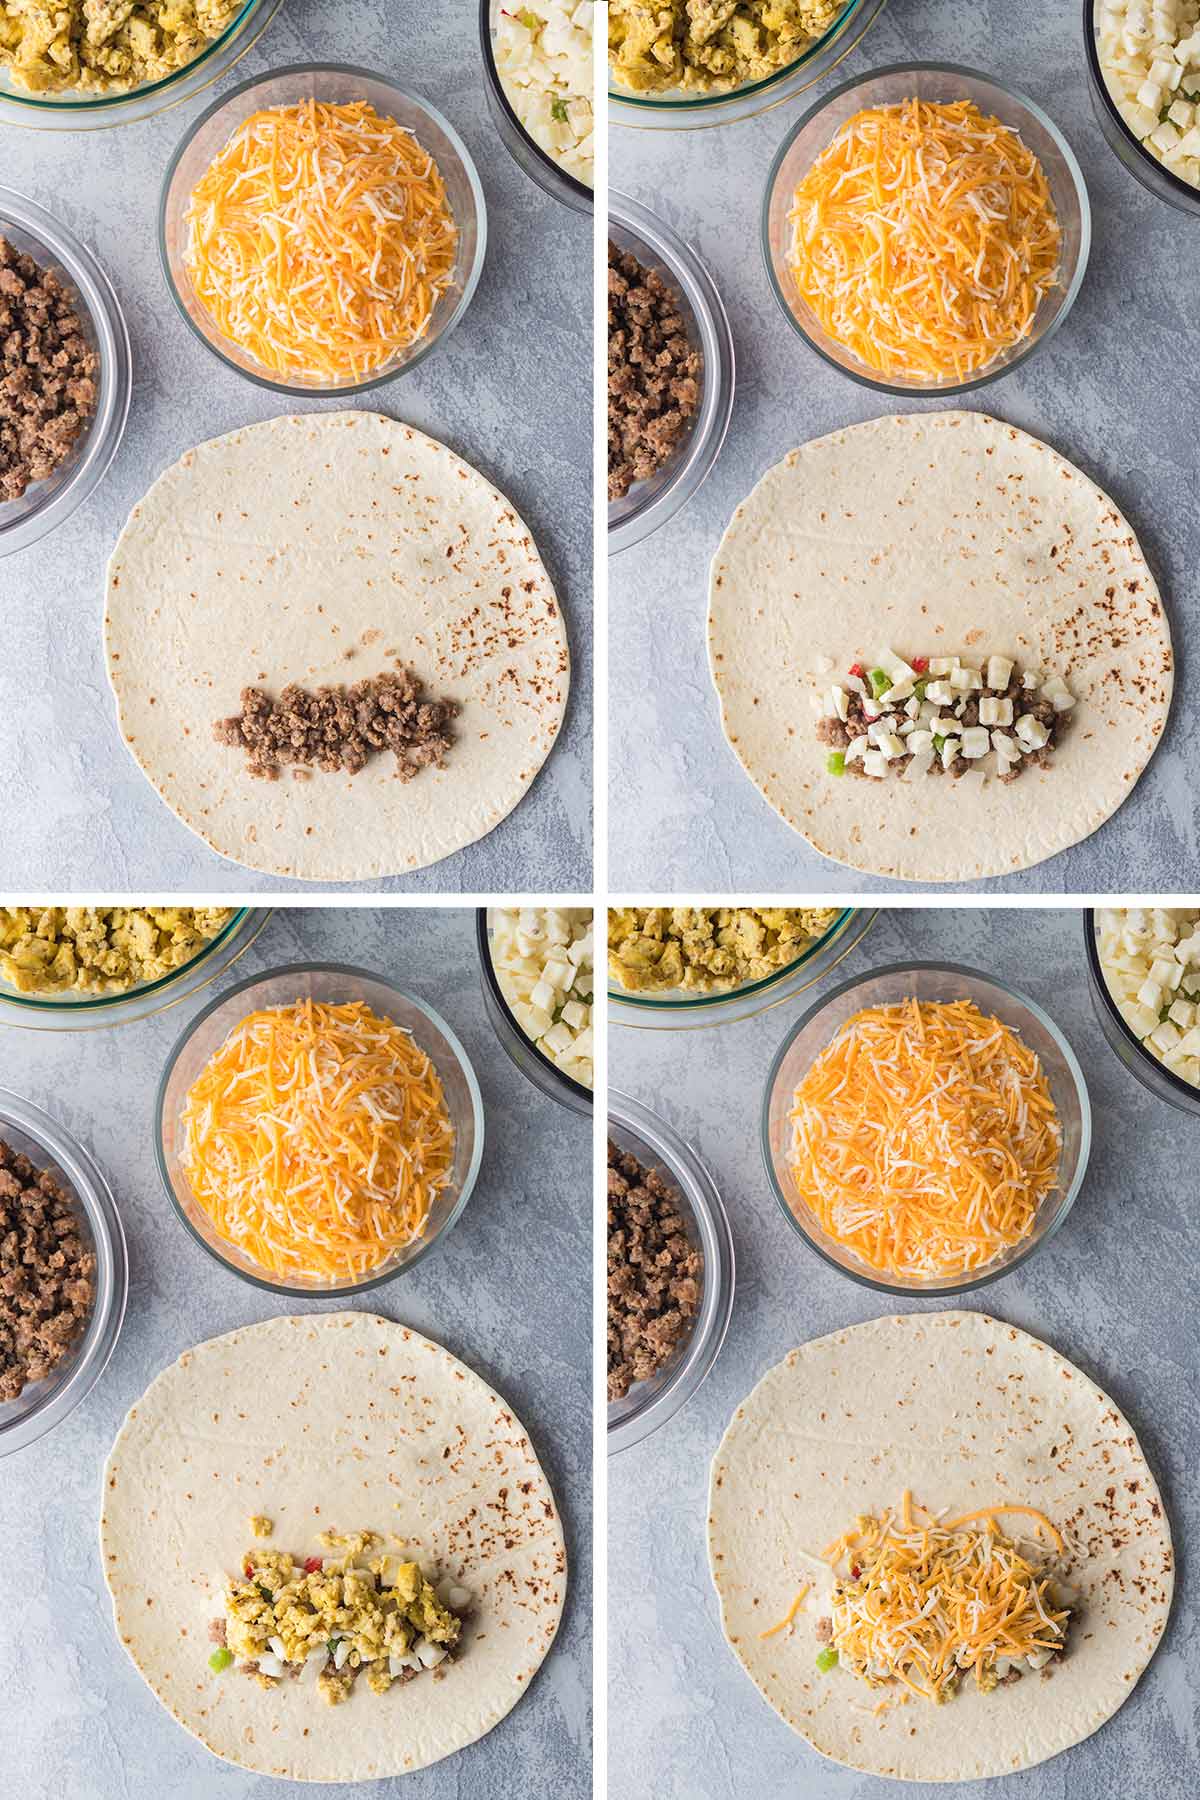
You’ll want to scramble your eggs and brown and drain your sausage, and place them is separate bowls to cool while you gather your other ingredients.
Find a nice flat counter or table space where you can set up with all your ingredients in easy reach.
If you have helpers, you can set it up as an assembly line and give each person a separate ingredient to add.
Once you have your ingredients prepped, it’s time to master the art of burrito rolling.
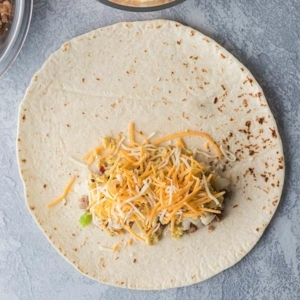
You’ll want to layer your ingredients in the center of the lower third of your flour tortilla. Use about 1/4 cup per filling ingredient with this recipe.
Don’t overfill the burritos! As tempting as it is to include ALL the ingredients, make sure to leave enough room for the burrito to close and seal properly. Otherwise, you’ll risk having a burrito explosion on your hands! Aim for a total filling amount of 1 to 1 1/4 cups.
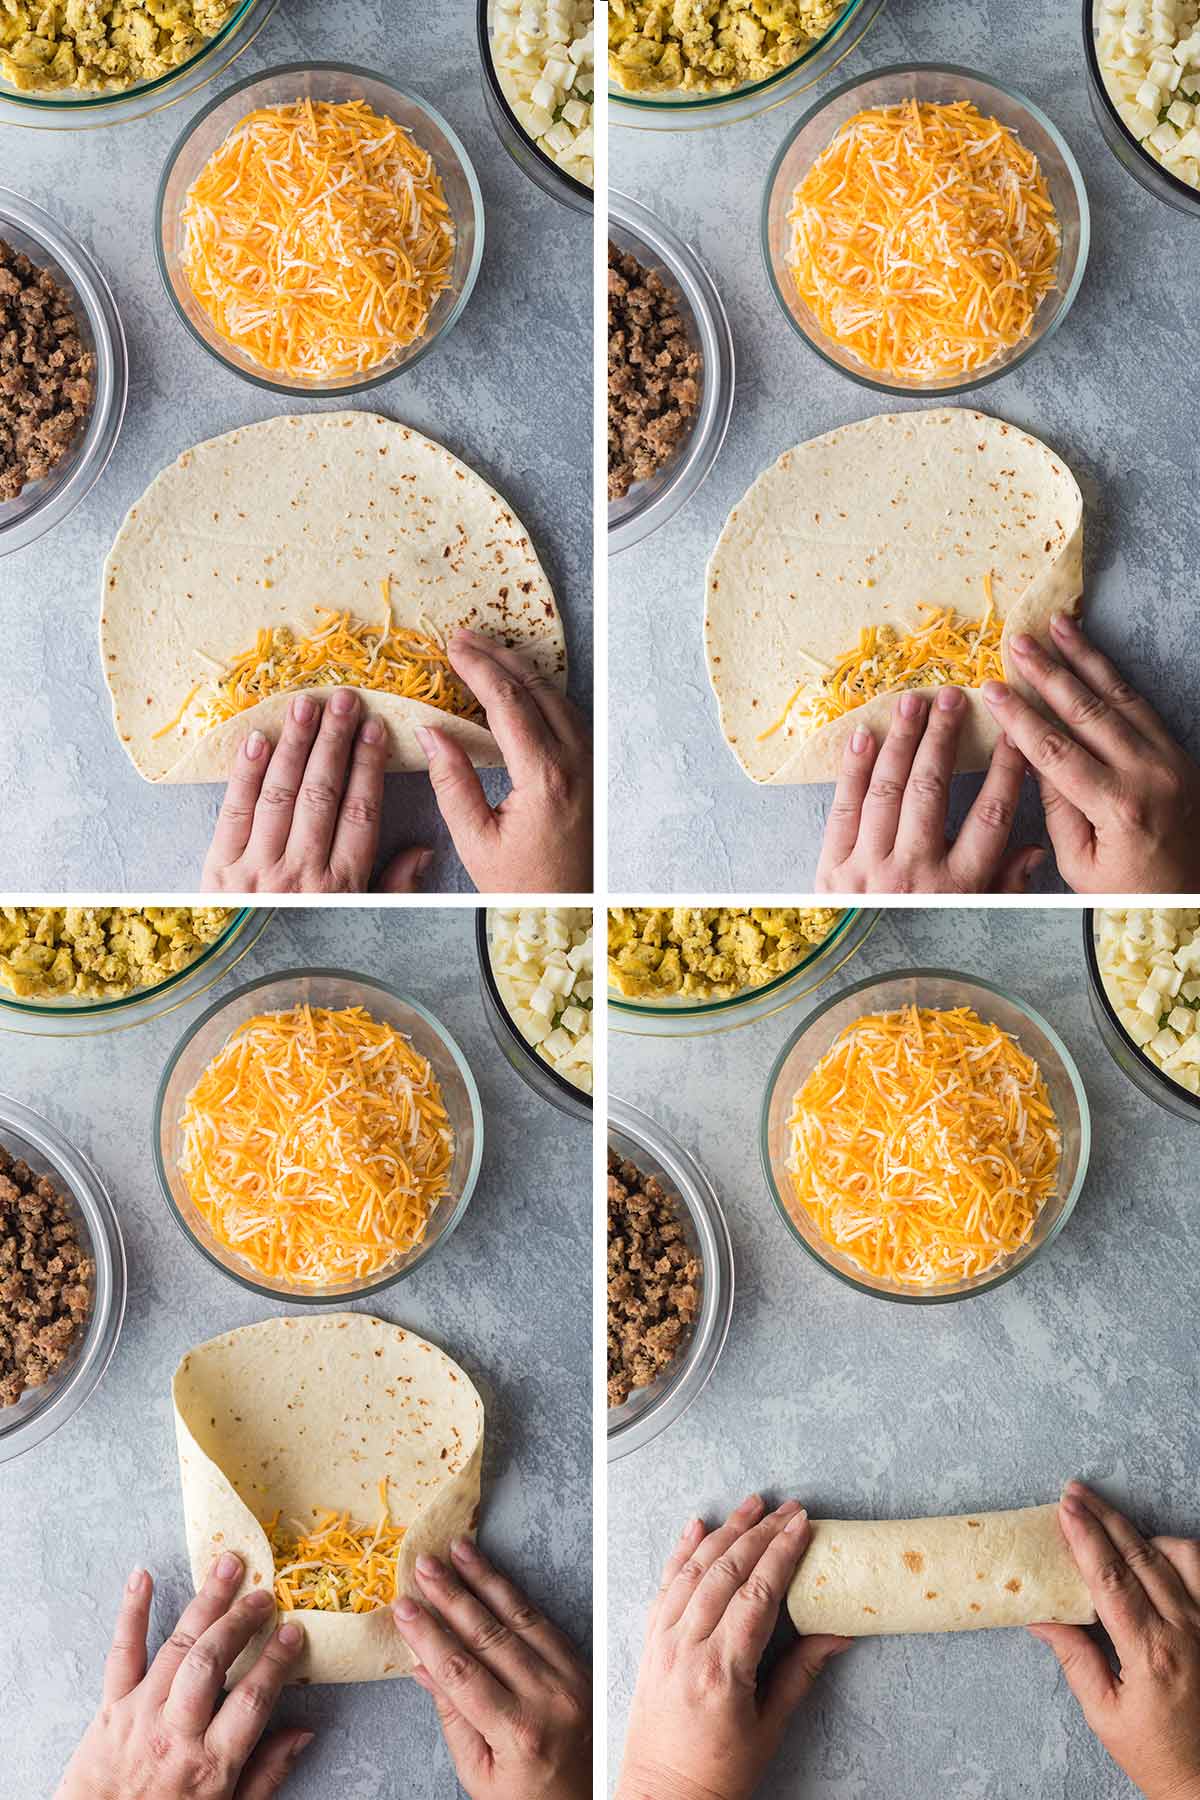
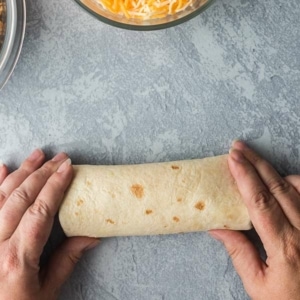
Now, to roll, start by folding the bottom of the tortilla up and over the filling, pulling snugly.
Then, fold the sides of the tortilla inward, towards the center.
Roll the burrito away from your, making sure the filling stays tucked inside. You may have to adjust the sides and fold them in a bit more as you got.
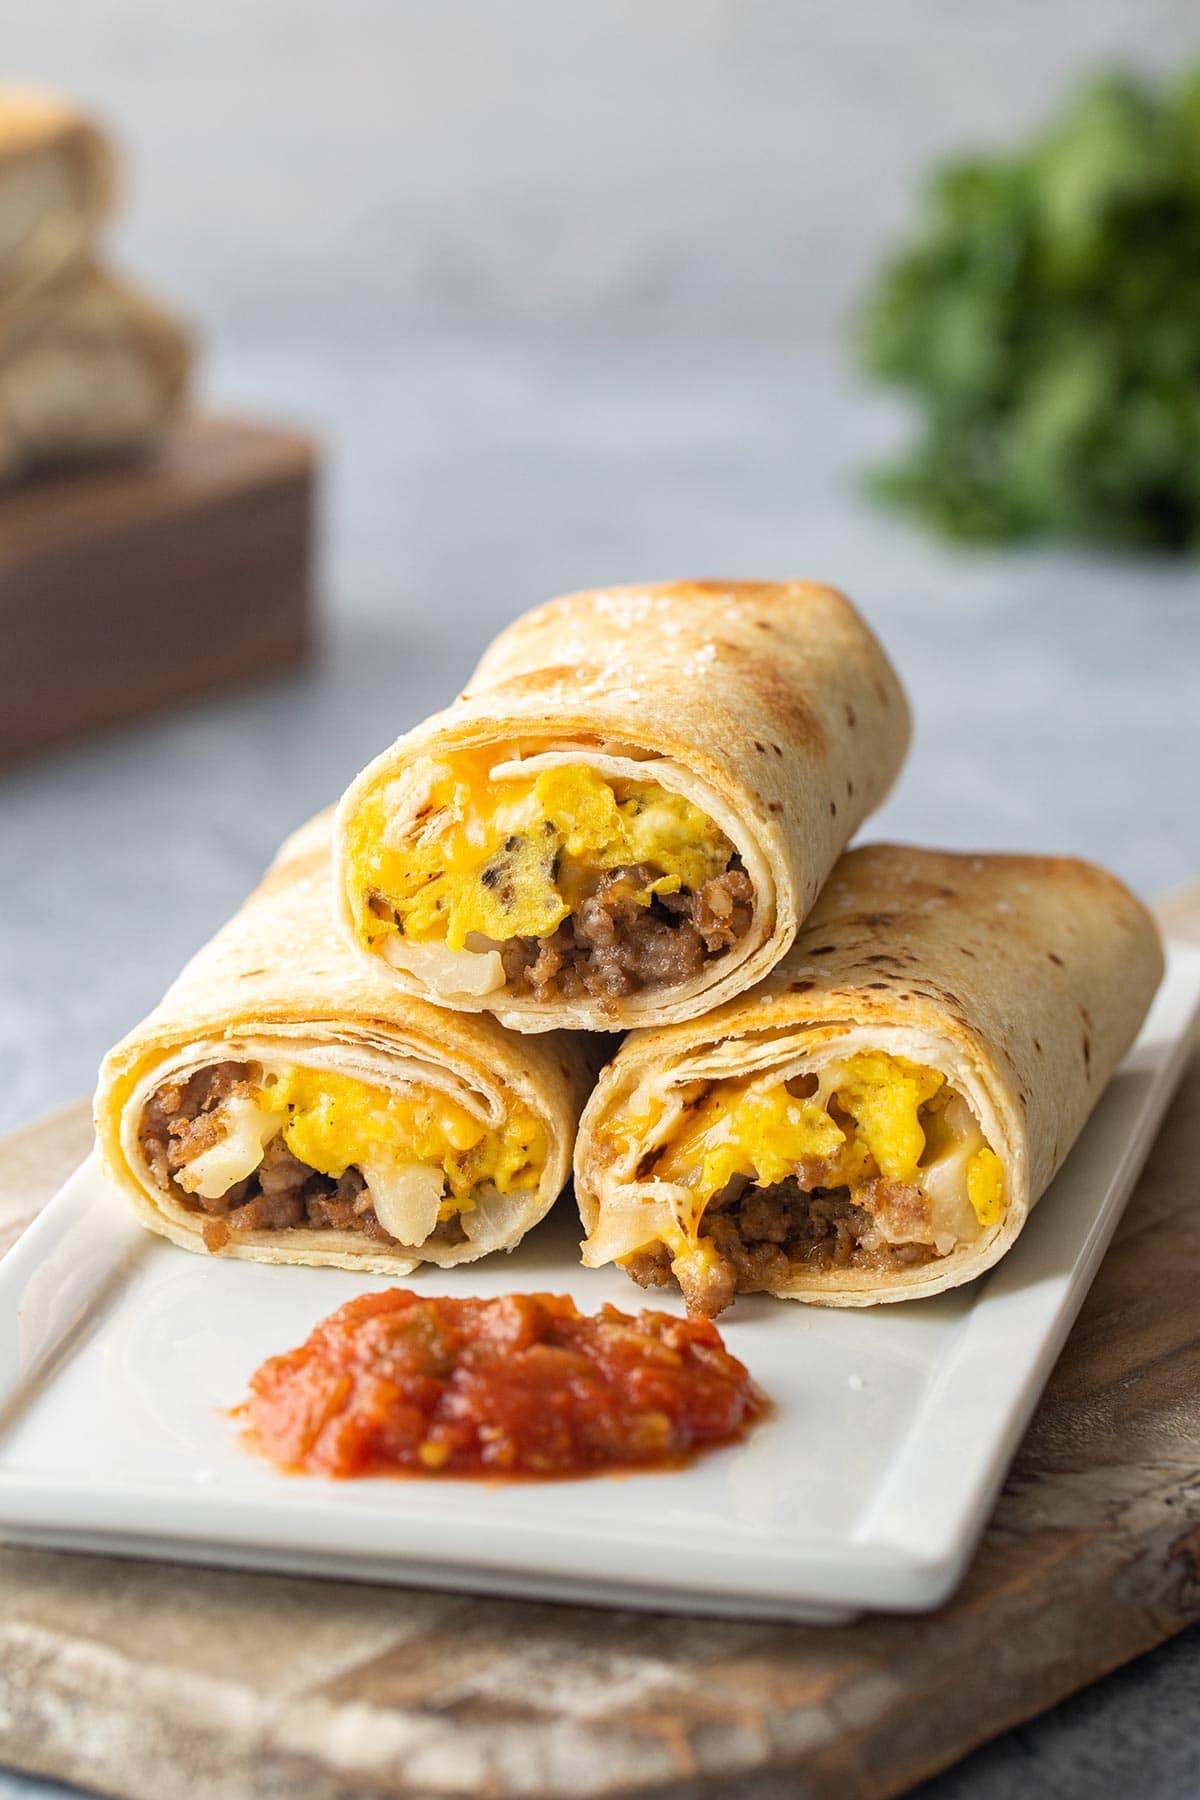
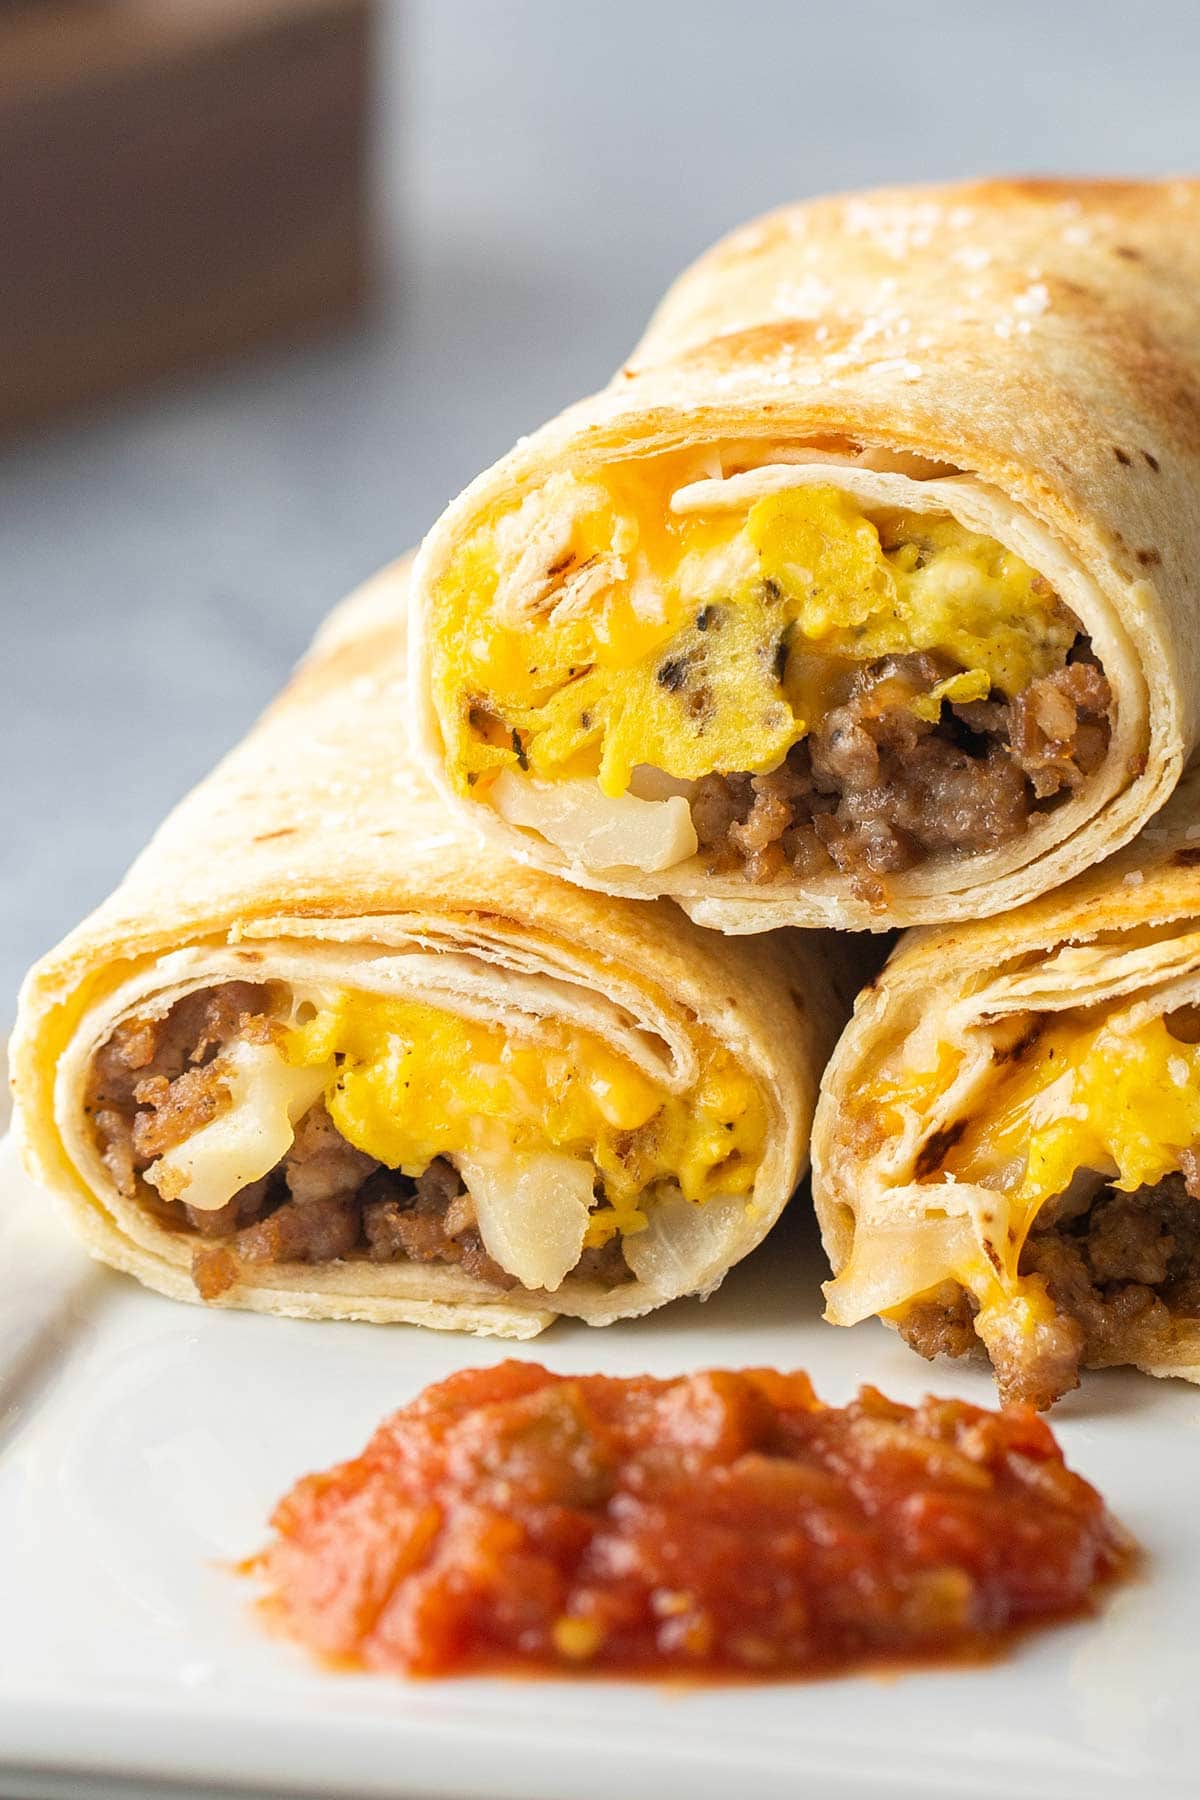
And voila! You’ve just created a beautiful, portable, savory breakfast masterpiece!
Side note: Don’t get discouraged if your first few attempts look a bit misshapen. It takes time to master the art. Keep going, and soon you’ll be rolling burritos like a pro! Besides, there are no breakfast burrito beauty pageants…the old adage is true, that it’s what’s on the inside that counts!
Freezing – The Secret to Make-Ahead Breakfast Success
To ensure that your easy freezer breakfast burritos are ready for busy mornings, proper freezing is essential.
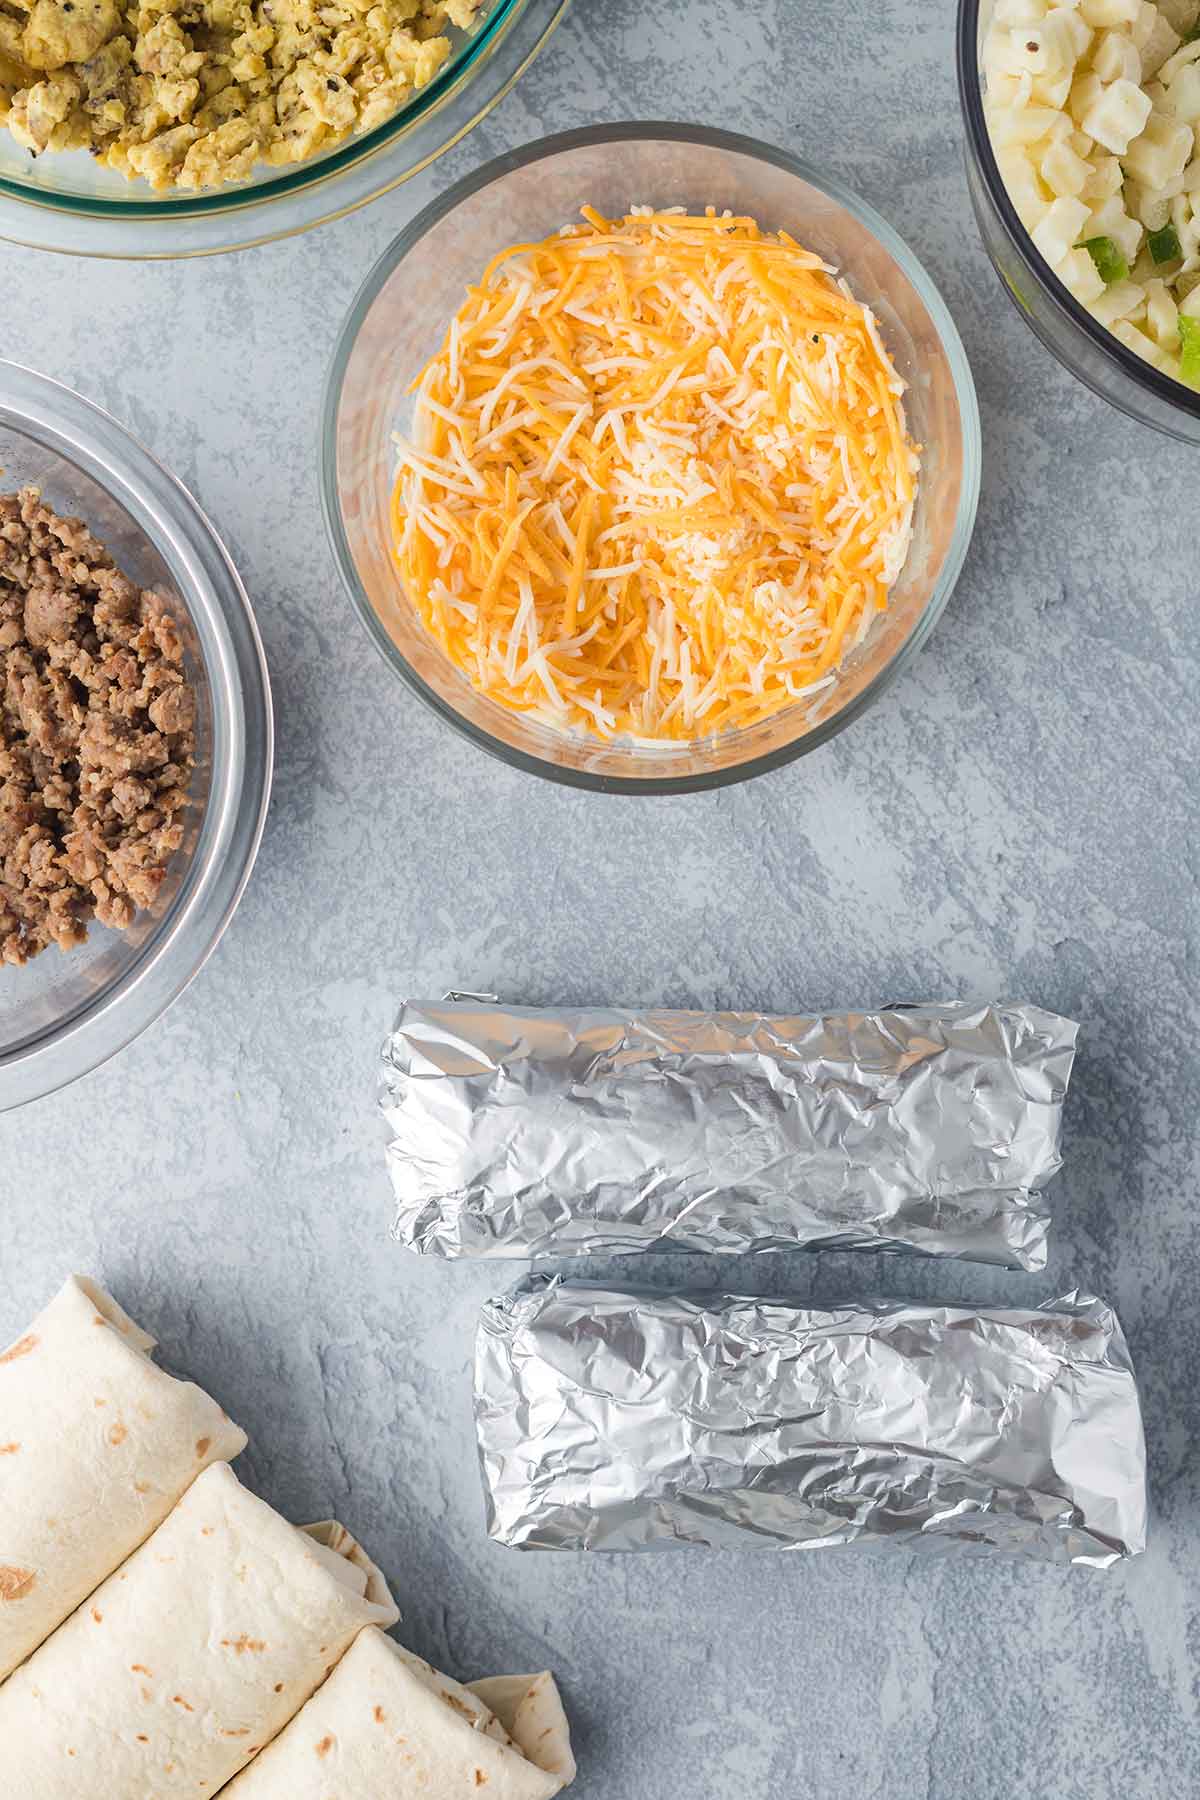
Start by allowing your rolled burritos to cool completely. This will prevent any unwanted condensation from forming inside, which would lead to soggy burritos and that would be no bueno.
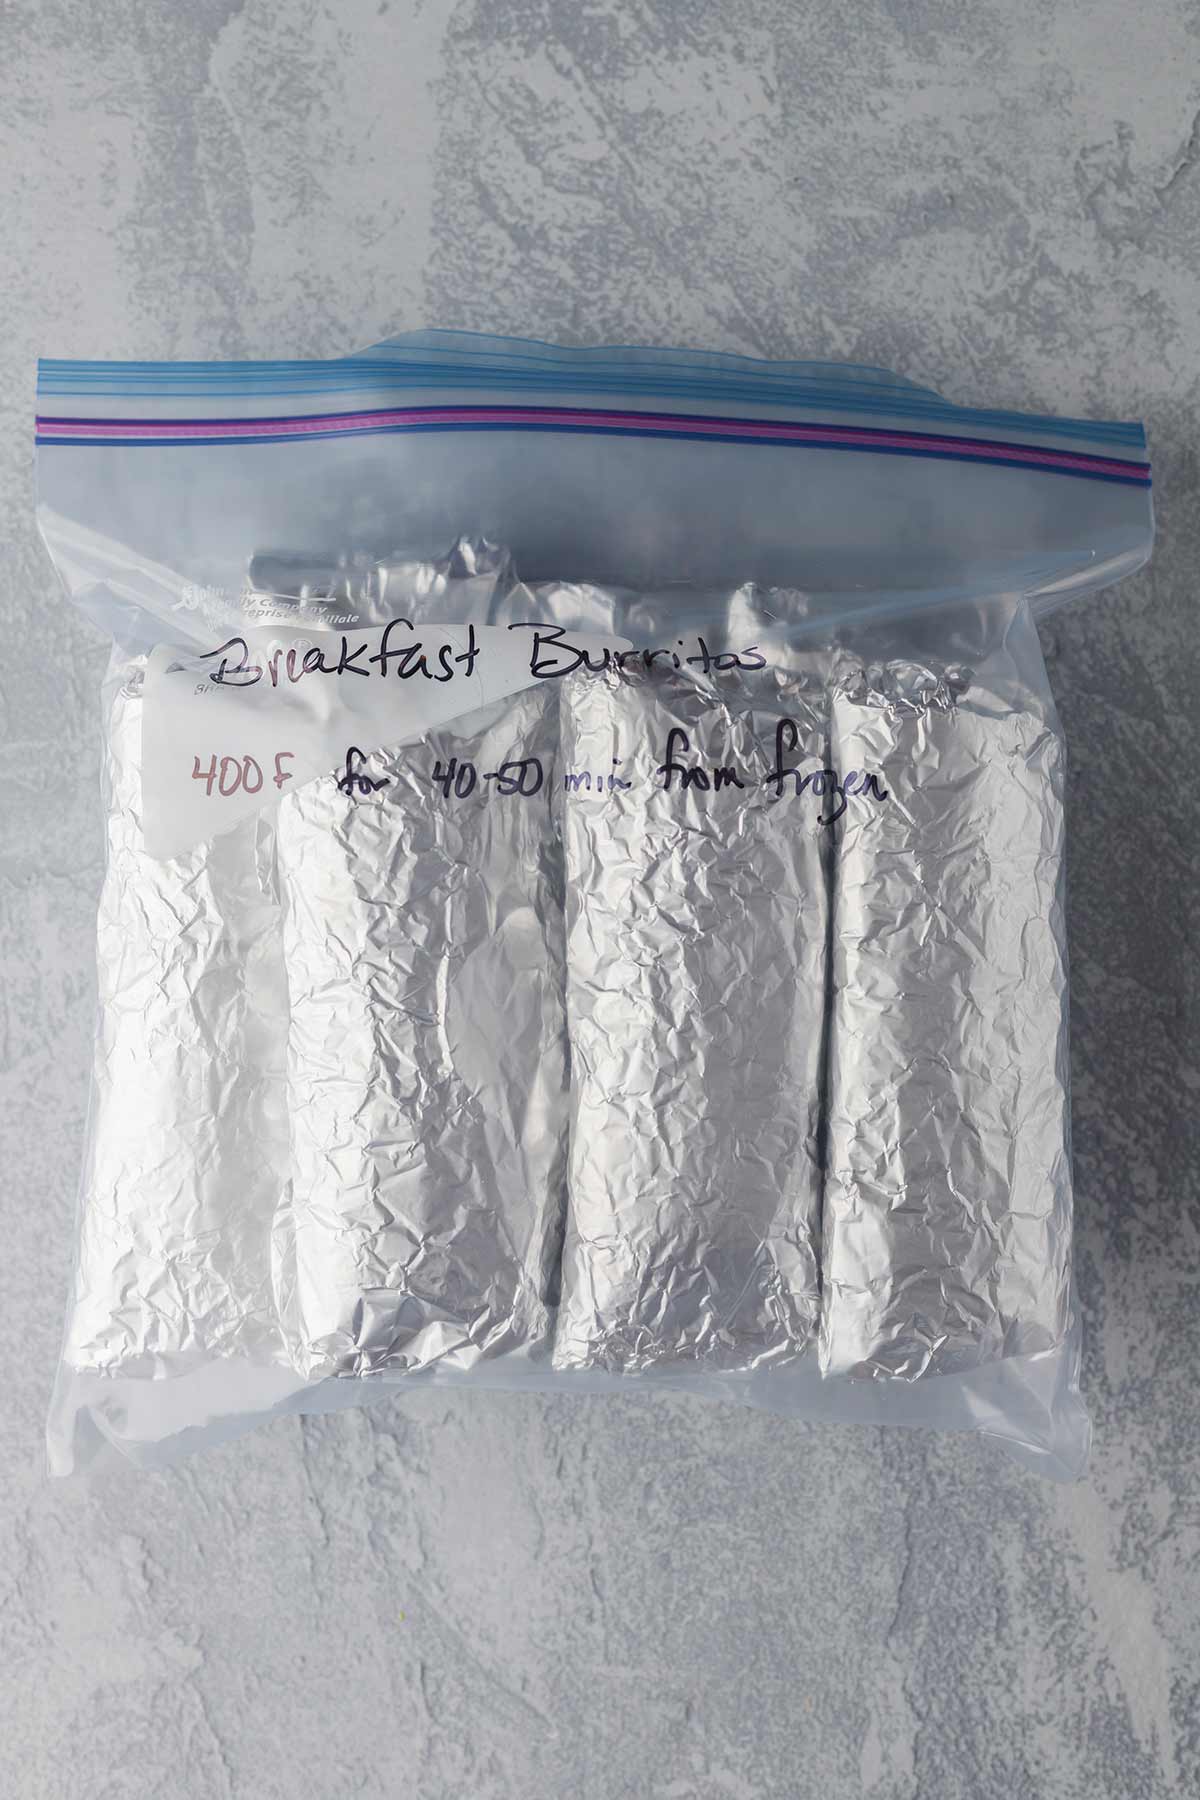
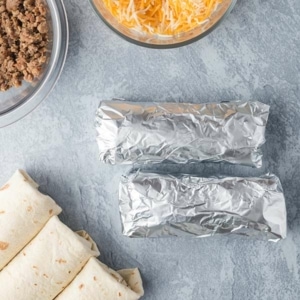
Once cooled, individually wrap each burrito tightly in aluminum foil, plastic wrap, or freezer paper. This will help prevent freezer burn and keep your burritos in peak breakfast shape!
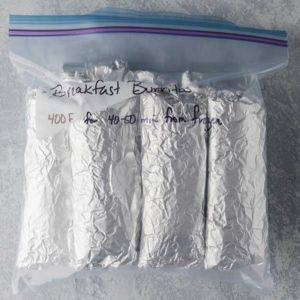
Place your wrapped burritos inside a gallon zip-top freezer bag or other airtight container, and then place in the freezer.
Be sure to label the bags with the date and type of burrito (if you make multiple varieties), and any special reheating instructions. You don’t want to be playing freezer meal roulette when you’re only half awake.
Reheating – The Moment of Frozen Burrito Glory
When you’re ready to enjoy your delicious breakfast burritos, you’ve got a couple different reheating options to choose from:
In the Microwave
Remove any plastic wrap or aluminum foil. Wrap the burrito loosely in a damp paper towel and place it on a microwave-safe plate.
Heat for 60 seconds, flip the burrito over, and then heat for another 60-90 seconds until the center is fully warmed through. (Note that cooking times will vary by microwave.)
If you find that your burrito gets soggy or develops hard spots, you may have better luck reheating it from thawed rather than directly from frozen.
In this case, pull out a few burritos from the freezer the night before and let them thaw in the refrigerator overnight.
In the morning, follow the steps above but cut your cook time to 30 seconds, then flip, then 30 more seconds.
Now, if you prefer a crispier tortilla…
In the Oven (or Toaster Oven)
Remove any plastic wrap and wrap each burrito in aluminum foil (if they aren’t already).
Place frozen burritos on a baking sheet, spaced so they are not touching each other, and bake, wrapped, at 400 degrees Fahrenheit for 20-30 minutes.
Remove the baking sheet from the oven and carefully unwrap the burritos (they will be hot!). Then place them back onto the baking sheet.
Spray each lightly with cooking spray or brush with melted butter (our favorite). Sprinkle with a little bit of kosher salt. Just trust me on this one.
Place the burritos on the baking sheet back into the oven and bake for an additional 20 minutes until they are golden brown and crispy delicious!
On the Stovetop
Remove any plastic wrap or aluminum foil.
Heat a non-stick skillet over medium-high heat. Melt a tablespoon or two of butter in the pan (totally optional, but well worth the effort) and cook the burrito for 3-4 minutes per side, until golden brown and heated through.
In the Air Fryer
Remove any plastic wrap or aluminum foil.
From frozen, cook your burrito for about 15 minutes at 350 degrees.
From thawed, we like to do about 5-6 minutes at 400 degrees.
No matter which method you choose, your breakfast burrito will be a warm, satisfying start to your day.
Customizing – Make-Ahead Breakfast Burritos Made Your Way
One of the best things about this easy breakfast burrito recipe is the amazing versatility. Feel free to customize your burritos to suit your taste buds and dietary needs. Here are a few suggestions:
- Vegetarian – Swap out the meat for extra veggies or beans. Go with diced sweet potatoes instead of hash browns.
- Vegan – Use dairy-free cheese and a plant-based protein like tofu or tempeh.
- Spicy – Add some jalapenos and hot sauce to the mix.
- Mexican-style – Add diced onions and bell peppers (if they aren’t already in your hashbrowns, or add even more), use chorizo sausage, and go with pepper-jack cheese to hold it all together.
- Southwestern-style – Go for Tex-Mex flair with scrambled eggs, chicken or turkey sausage, black beans, corn, and salsa. If you really want to liven your morning, add in some chipotle peppers in adobo sauce! Chop them up find and mix them into your fillings for burst of flavor that will certainly jump-start your day!
- Sweet, Sweet Sunrise – Add sweetness to your morning by adding some crumbled crispy bacon and drizzling a touch of maple syrup into your burrito. It’s a fab combination of sweet and savory.
- Kid-Friendly – If you need something a bit tamer for the younger crowd, go with scrambled eggs, tater tots (just add them right from frozen – no need to cook first), and plenty of extra cheese for ooey-gooey goodness!
These variations are just the tip of the iceberg. Feel free to mix and match ingredients, get creative, and let your taste buds guide you.
The beauty of these easy make-ahead breakfast burritos is that they’re a canvas for your culinary imagination.
So, go forth and create beautiful breakfast burrito masterpieces!
FAQs
Absolutely! Eggs freeze surprisingly well and can be a delicious component of your breakfast burritos. Just make sure to full cook the eggs before assembling (but be careful not to overcook), and allow them to cool before wrapping and freezing.
When properly stored in a freezer bag or airtight container, these burritos can be kept in the freezer for up to 3 months. However, for the best taste and texture, I recommend eating them within 1-2 months.
Absolutely! There are plenty of gluten-free tortilla options available, such as corn tortillas or gluten-free wraps (you can even make your own – this recipe for gluten-free tortillas is the BOMB!). Just make sure to check the packaging to ensure they are certified gluten-free.
You sure can! Make-ahead breakfast burritos make a great option for meal prepping or for feeding a crowd. Simply multiply the recipe and assembly process to make as many burritos as you need. Just be sure you have enough freezer space to store them all.
Make-Ahead Freezer Breakfast Burritos
INGREDIENTS
- 9 eggs
- 1/4 cup milk (optional)
- 1/2 tsp. kosher salt
- 1/4 tsp. black pepper
- 1/2 tsp. dried basil
- 1 pound loose ground sausage browned and drained
- 1/2 bag frozen hash brown potatoes regular or southern-style
- 3 cups shredded cheddar cheese
- 12 flour tortillas burrito size
INSTRUCTIONS
- In medium bowl, crack eggs and scramble. Add milk (if desired), salt, pepper, and basil. Mix to combine.
- Scramble eggs in skillet over medium heat until just fully cooked. Remove from heat and set aside to cool.
- In separate pan or skillet, brown breakfast sausage over medium-high heat until cooked through and no longer pink. Remove from heat and drain off any fat. Set aside to cool.
ASSEMBLY
- Once eggs and sausage have cooled, layer 1/4 cup of each filling ingredient – hash browns, sausage, eggs, and shredded cheese – in the center on the lower third of a flour tortilla.

- Bring the bottom of the tortilla up and wrap snugly over the filling.
- Fold sides of the tortilla inward toward the center.
- Roll tortilla away from you to form a burrito, being sure to keep filling tightly wrapped.
- Wrap burrito in plastic wrap, aluminum foil, or freezer paper.
- Repeat assembly until all tortillas are used.
- Place wrapped burritos into gallon-sized tip-top freezer bags (about 6 or 7 per bag).
- Label and date the bag, remove as much air as possible, and seal.
- Place bags in the freezer to freeze.


REHEATING
In the microwave (frozen):
- Remove any plastic wrap, freezer paper, or aluminum foil. Wrap the burrito loosely in a damp paper towel and place on a microwave-safe plate.
- Heat in the microwave for 60 seconds, then flip the burrito over, and heat for another 60-90 seconds until the center is fully warmed through.
In the microwave (thawed):
- Remove burrito(s) from the freezer and place into refrigerator to thaw overnight.
- Proceed with instructions above from frozen, but change cook time to 30 seconds, then flip, then 30 more seconds.
In the oven or toaster oven (frozen):
- Remove any plastic wrap or freezer paper and wrap each burrito in aluminum foil (it they aren't already).
- Place frozen burritos on a baking sheet, spaced so they are not touching each other.
- Bake, wrapped, at 400 degrees Fahrenheit for 20-30 minutes.
- Remove from oven and carefully unwrap burritos (they will be hot). Place back onto baking sheet.
- Spray burrito(s) lightly with cooking spray or brush with melted butter. Sprinkle with small amount of kosher salt.
- Place burrito(s) back into oven and bake for an additional 20 minutes until they are golden brown and crispy.
In the oven or toaster oven (thawed):
- Follow steps 1 and 2 above, then skip to step 5 and proceed to bake the burritos, unwrapped, for 20 minutes at 400 degrees Fahrenheit.
On the stovetop (frozen or thawed):
- Remove any plastic wrap, freezer paper, or aluminum foil.
- Heat a non-stick skillet over medium to medium-high heat. Melt a tablespoon of butter in the pan.
- Cook burrito(s) for 3-4 minutes per side until golden brown and heated through.
In the air fryer (frozen):
- Remove any wrapping.
- Place burrito(s) into air fryer basket.
- Cook for 15 minutes at 350 degrees.
In the air fryer (thawed):
- Remove burrito(s) from the freezer and place into refrigerator to thaw overnight.
- Remove any wrappings and place thawed burrito(s) into air fryer basket. (If doing multiple make sure they do not touch.)
- Cook for 4-6 minutes at 400 degrees.