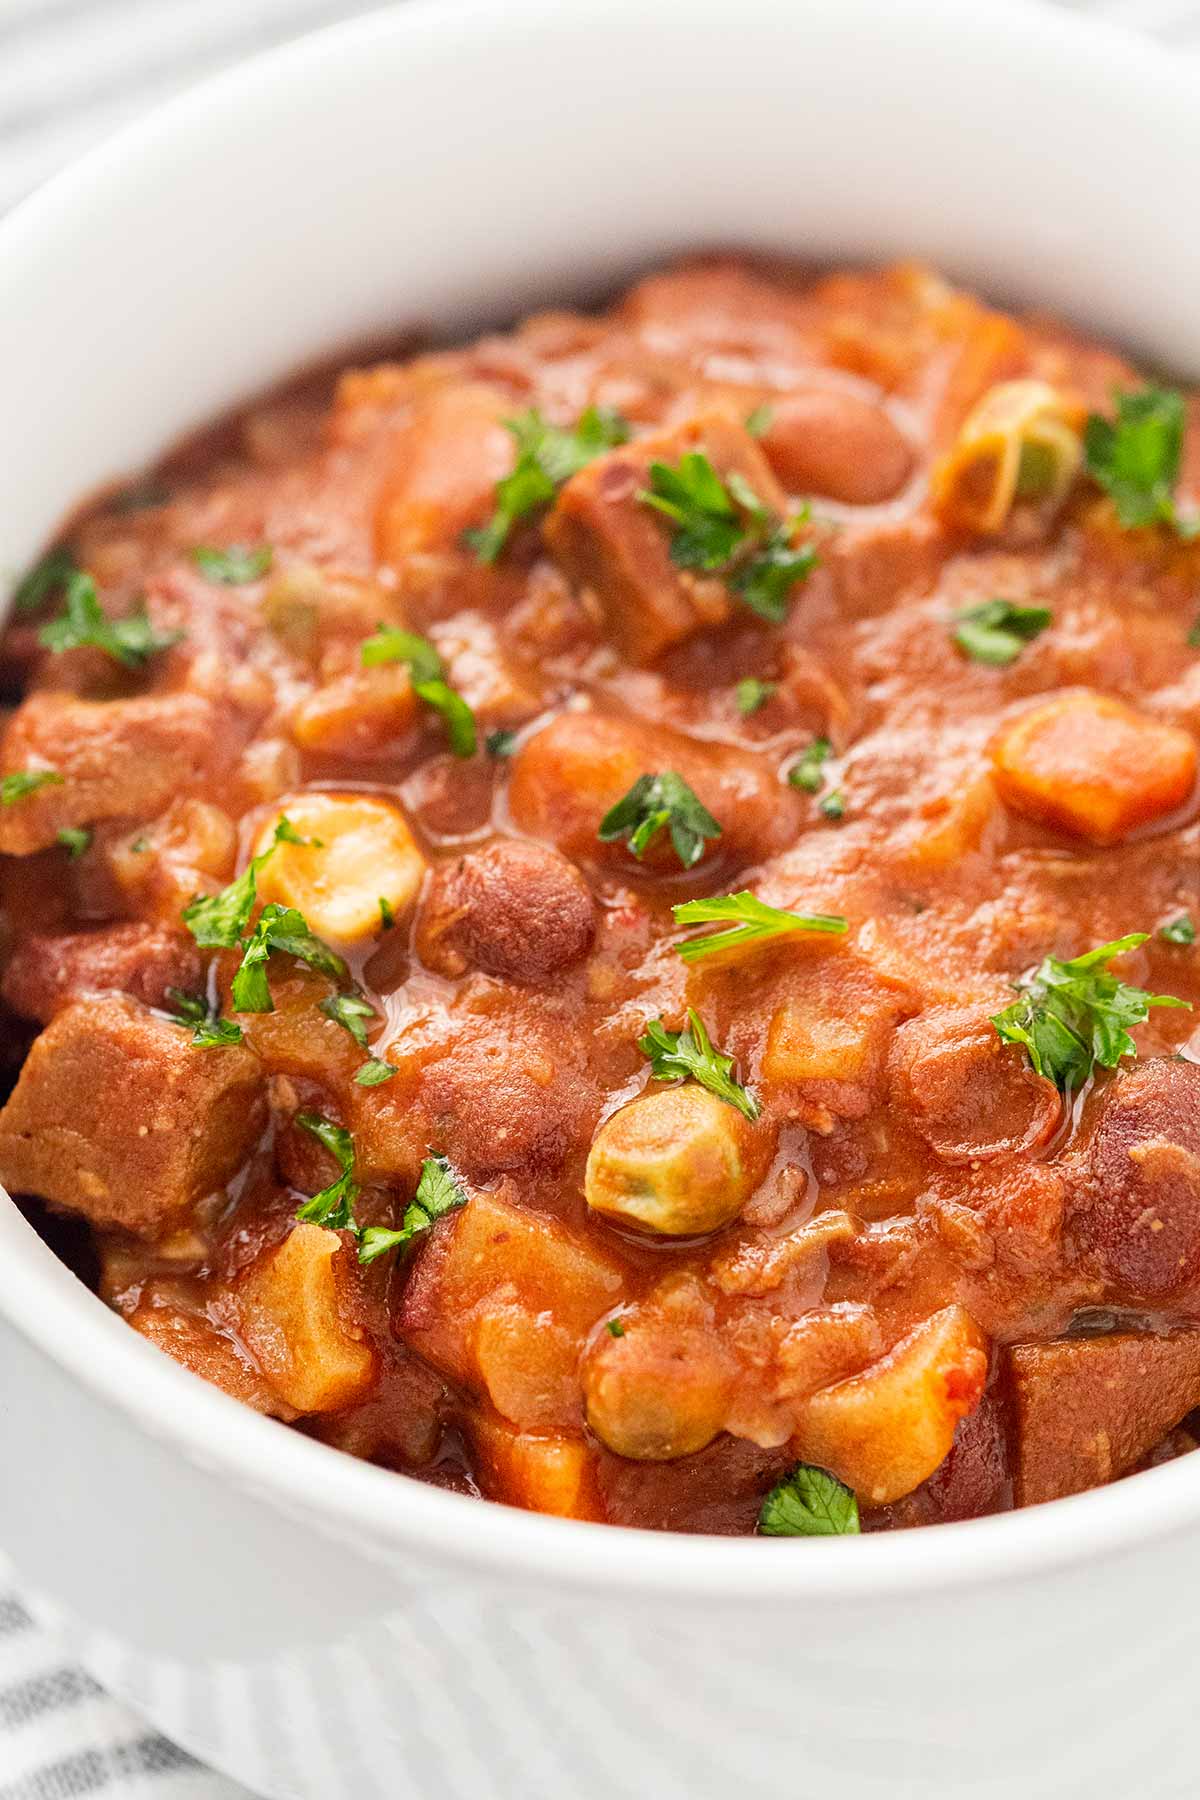
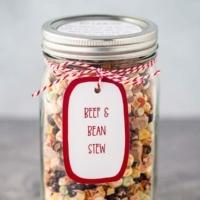
Beef & Bean Stew in a Jar
This Beef & Bean Stew Meal in a Jar makes for a hearty beef, bean, and vegetable stew with no fuss and no muss! You will not believe this came from food storage! A great easy meal to keep on hand in your pantry, or use as a neighbor gift for the holidays!
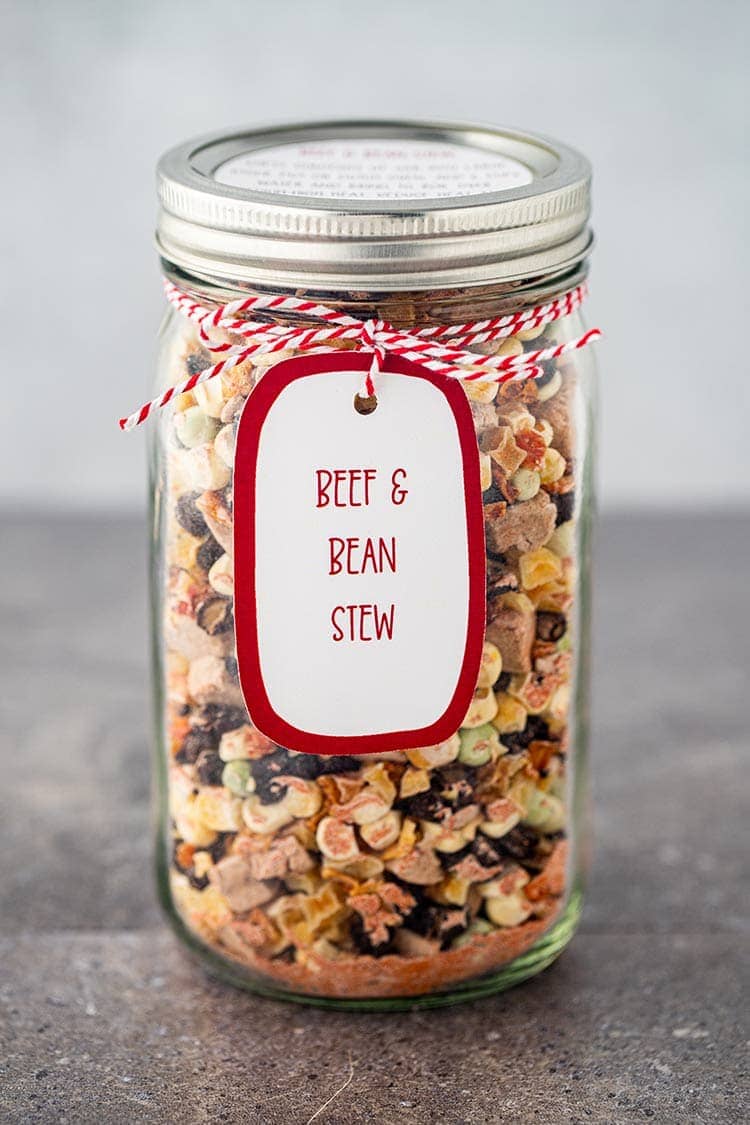
Beef & Bean Stew Meal in a Jar
This Beef & Bean Stew in a Jar is one of my favorite meal in a jar recipes! I think it is such a great option for food storage, incorporating plenty of veggies and protein in one hearty meal. And best of all, it doesn’t taste like “food storage” at all!
One of the tricks is making sure to use the right beef. For this recipe, I prefer to use freeze-dried diced beef. You could use freeze dried ground beef, but that makes it a bit more like a hamburger soup. Which is still good, don’t get me wrong! But I’ve just always been partial to the chunkiness of a really great beef stew, so diced beef it is for me!
I’m also one to like potatoes and carrots in my stew, and I’ve never turned down corn and peas as additional options, although they aren’t very “traditional” in stews. Then again, neither are beans … However, I feel like they are a great addition to this beef stew recipe, both to add extra vegetables (which can be hard to fit in when you’re eating from food storage) and to add extra “filling” power to keep you fuller longer.
The recipe is adapted from one that I got from Chef Tess’s blog, and you can see her original recipe at the link provided.
Items You Will Need:
- Wide-mouth quart mason (canning) jars, with new lids, and rings
- Foodsaver vacuum sealer with hose and wide-mouth jar sealer attachment, AND/OR 100cc oxygen absorbers (one per jar)
- Instruction labels or Sharpie marker to write instructions on lid
- (optional) Printable gift tags for Cricut machine
- Ingredients
- Quick cook black beans
- Freeze-dried vegetable mix
- Freeze-dried diced beef
- Dehydrated diced potatoes
- Dry minced onion (you can usually find this at most grocery stores or club stores like Sam’s or Costco)
- Tomato powder
- Thyme
- Granulated garlic
- Beef bouillon (powdered or granule if you can find it, if not you can crush bouillon cubes to make your own “powder”)
- Salt
How to Make Beef & Bean Stew Meal in a Jar
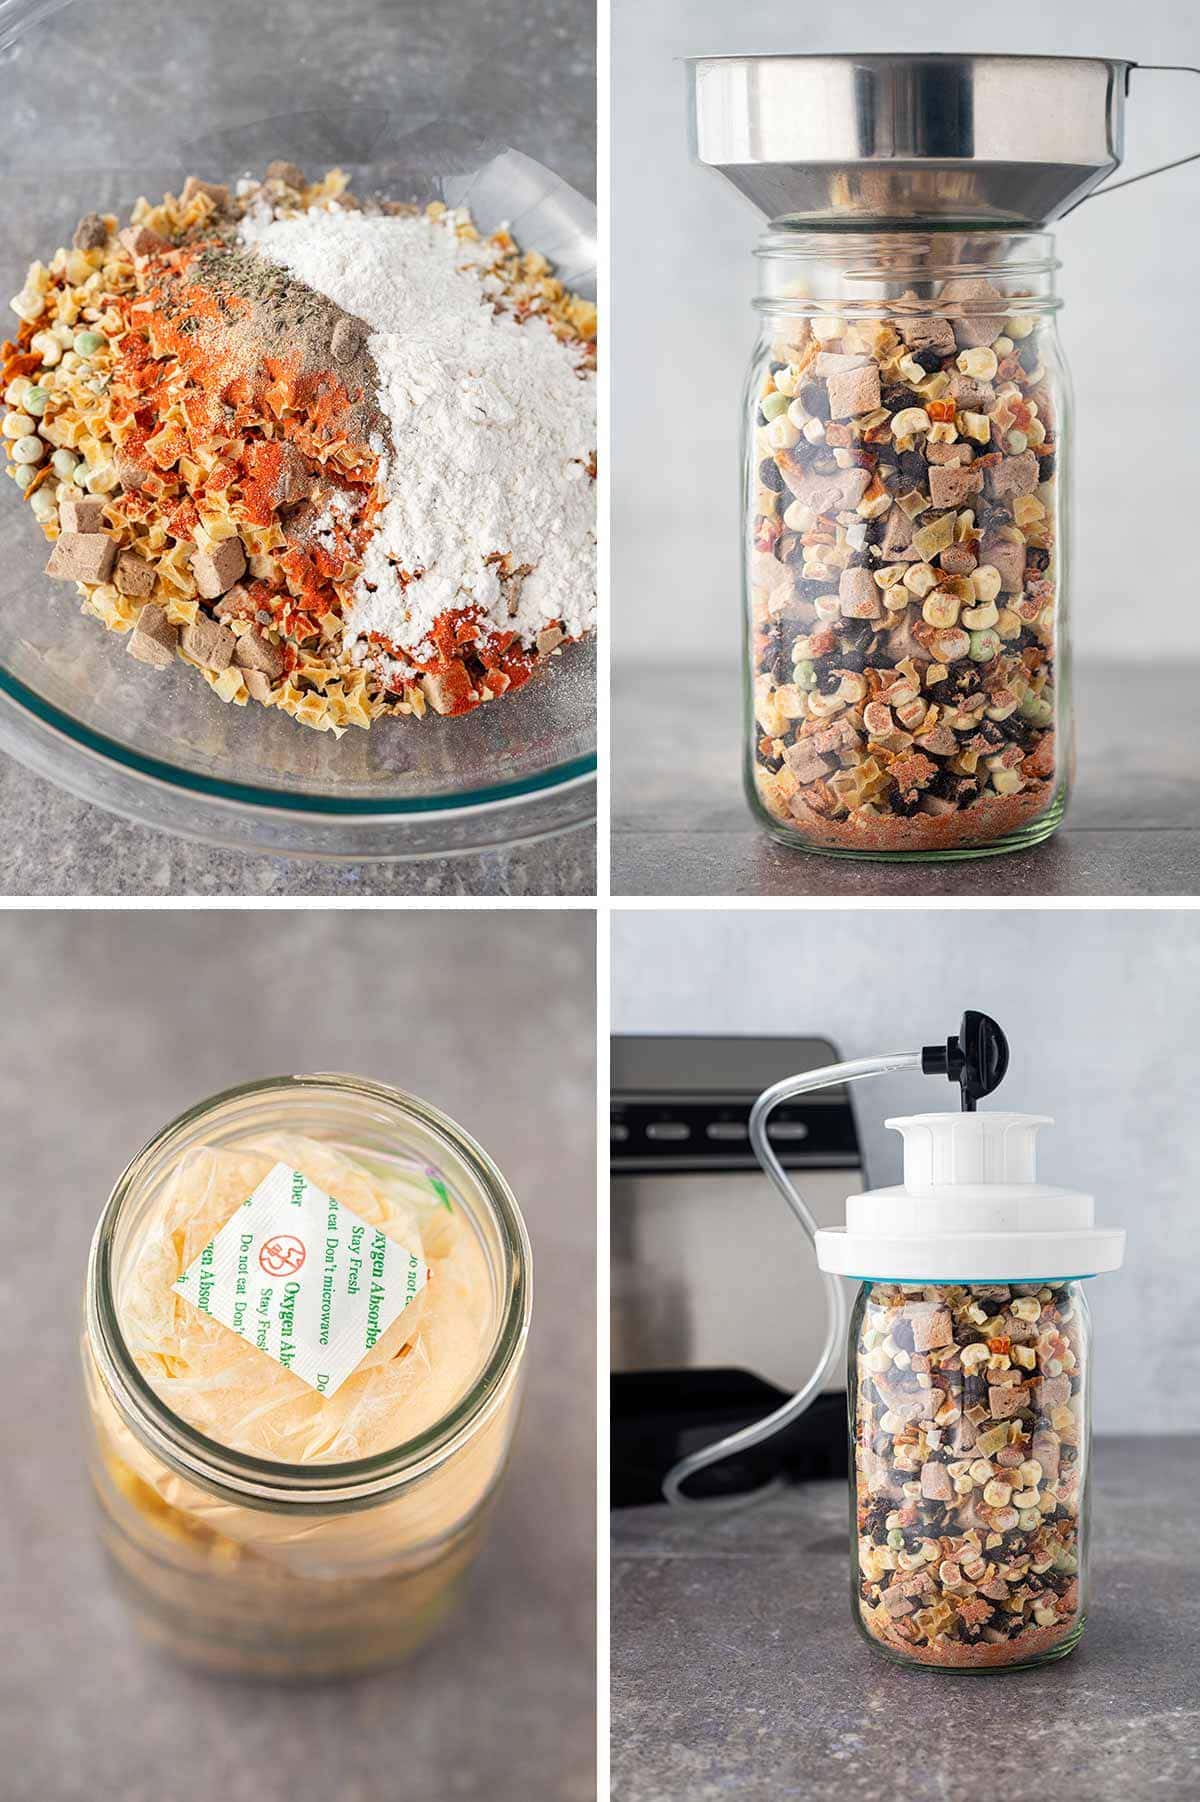
- Layer each ingredient, one at a time, into a clean wide-mouth quart mason jar in the order listed in the recipe.
- When adding the powdered ingredients, you will need to shake gently to settle contents to make room for everything. The powdered ingredients should settle to the bottom around the beans. Space in the jar is at a premium for this recipe, so if you find that the contents just don’t quite fit fully in the jar, even after shaking and settling, you can place all the ingredients in a large bowl, stir them up slightly, and then scoop them into the jar – that often helps save a little space.
- If not using a Foodsaver to vacuum seal the jar, place one 100cc oxygen absorber on top of the ingredients. (You can use an oxygen absorber in addition to vacuum sealing the jar as well.)
- Wipe off the rim of jar to make sure it is clean. Then place a new lid on the jar.
- To seal:
- If using a FoodSaver to vacuum seal the jar, carefully place the wide-mouth jar attachment over the top of the jar and lid, attach it to the FoodSaver, and vacuum seal following your model’s instructions (for most newer models you’ll use the Marinate or Accessory option). Once done, remove the hose from the top of the jar sealer, and then carefully remove the jar sealer attachment off of the jar. Place ring onto jar and tighten.
- If using just an oxygen absorber, place the lid on the jar and screw on the ring. Allow jar to sit undisturbed as oxygen absorber works. At some point, the lid of the jar should suck down and seal. You will know it is sealed when you press on the center of the lid and it does not flex. (If it flexes, it is not sealed.)
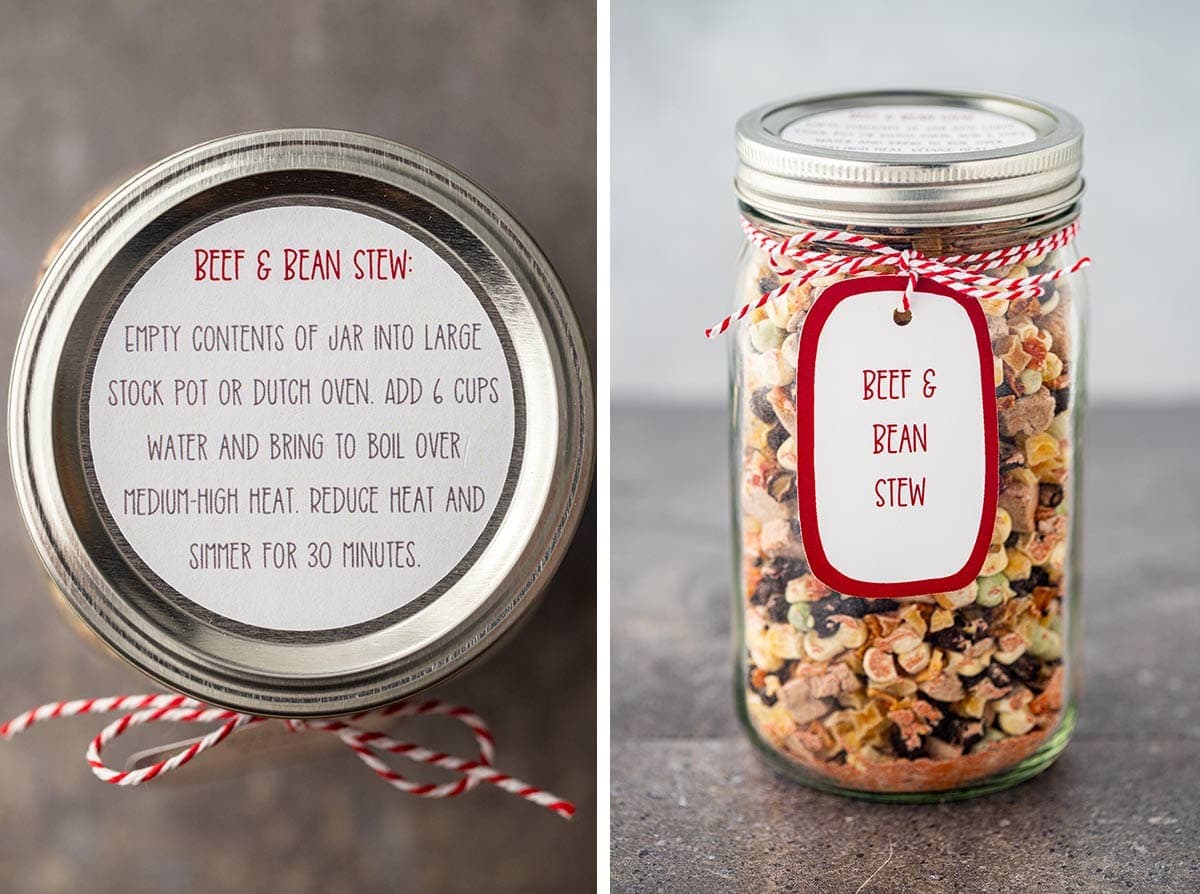
- Attach instruction label to top of jar, or write cooking instructions on lid with sharpie marker.
- Store jar in cool, dry place away from direct sun.
A Note on Storing or Gifting the Meals in a Jar
You’ll need to store the jar(s) where it will not be jostled as this can inadvertently pop the seal. And you should check on the seal periodically to make sure that it is holding. Most of the time this has not been a problem for me, but occasionally I find one that loses the seal over time. Using an oxygen absorber in combination with the vacuum sealing with the FoodSaver will help keep that seal extra tight.
Be especially vigilant in periodically checking the jars that contain freeze-dried meats, as they will tend to soak up moisture from in the air once that seal pops.
There’s no need to get fancy with these if they are going into your food storage, but you should make sure to label them, and it helps to write the cooking instructions on the lid as well. If you’d like, my friend Amy at The Happy Scraps has designed printable label stickers that you can use, and she also has gift tags available that you can cut with a Cricut machine if you’d like to give these meals in a jar as gifts!
Questions and Substitutions
How long are these Beef & Bean Stew in a Jar meals good for?
As long as they are stored properly and the seals stay holding, these jars are shelf-stable for up to 10 years! Shelf life for the meal is calculated using the shelf life of whichever ingredient in the meal has the shortest shelf life on its own. In this case, that is the cheese powder, which has a typical shelf life of about 10 years.
What are quick cook beans? Can I just use regular beans in this recipe instead of the quick cook beans?
Quick cook beans are ones that have been partially cooked and then dehydrated. Because of this, they don’t take nearly as much time to reconstitute and soften when using in meals.
Regular dry beans need to be soaked first, and the nature of the meals in a jar makes that hard to do. You could use dry beans and put them in a baggie to separate them from the other ingredients so you could soak them the night before. But that’s an awful lot of work, and the recipe has not been tested for that, so you’d need to wing it on cook times and water amounts. I really recommend just sticking with the quick cook beans here – honestly.
Freeze-dried meat is so expensive (or hard to find right now) – can I use something else?
Yes! Because it is real meat and due to the complicated nature of the freeze-drying process, freeze-dried meats are not cheap! And with the ongoing pandemic, it can be VERY hard to find! If you are needing to stay on a budget for these, you can substitute a vegetarian meat substitute known as “textured vegetable protein”, sometimes referred to as TVP for short. It is soy-based, and made to have a similar taste and texture to the “real” stuff. For this recipe, if you decide to use TVP, I recommend using Beef Flavored TVP for best flavor. There are several options available ranging from ground beef texture, to chunks, to shredded. I recommend the “chunks” in this particular recipe.
Update for 2020: As the pandemic has progressed, it has become increasing more difficult to find freeze-dried items, especially freeze-dried meats. And if you are lucky enough to find some, it is often marked up beyond belief. SO, for right now, I DO NOT RECOMMEND using freeze-dried beef in this recipe unless you can find it at a reasonable price and have the budget for it. A great alternative is to use the TVP option above OR make the meal as written, but leave out the ground beef all together. Then, purchase some canned shredded beef online or at a warehouse such as Costco (although I haven’t seen any at Costco for quite some time now)(, or even can your own, and store that or gift that together with the jarred meal. You can even make the meal without any meat and then add fresh browned ground beef when you make the meal. You could also easily swap out beef for chicken in this recipe, and use canned chicken from online, or from Sam’s Club or Costco, or even chicken you can yourself, to be stored together with the jarred meal and then added at the time of cooking.
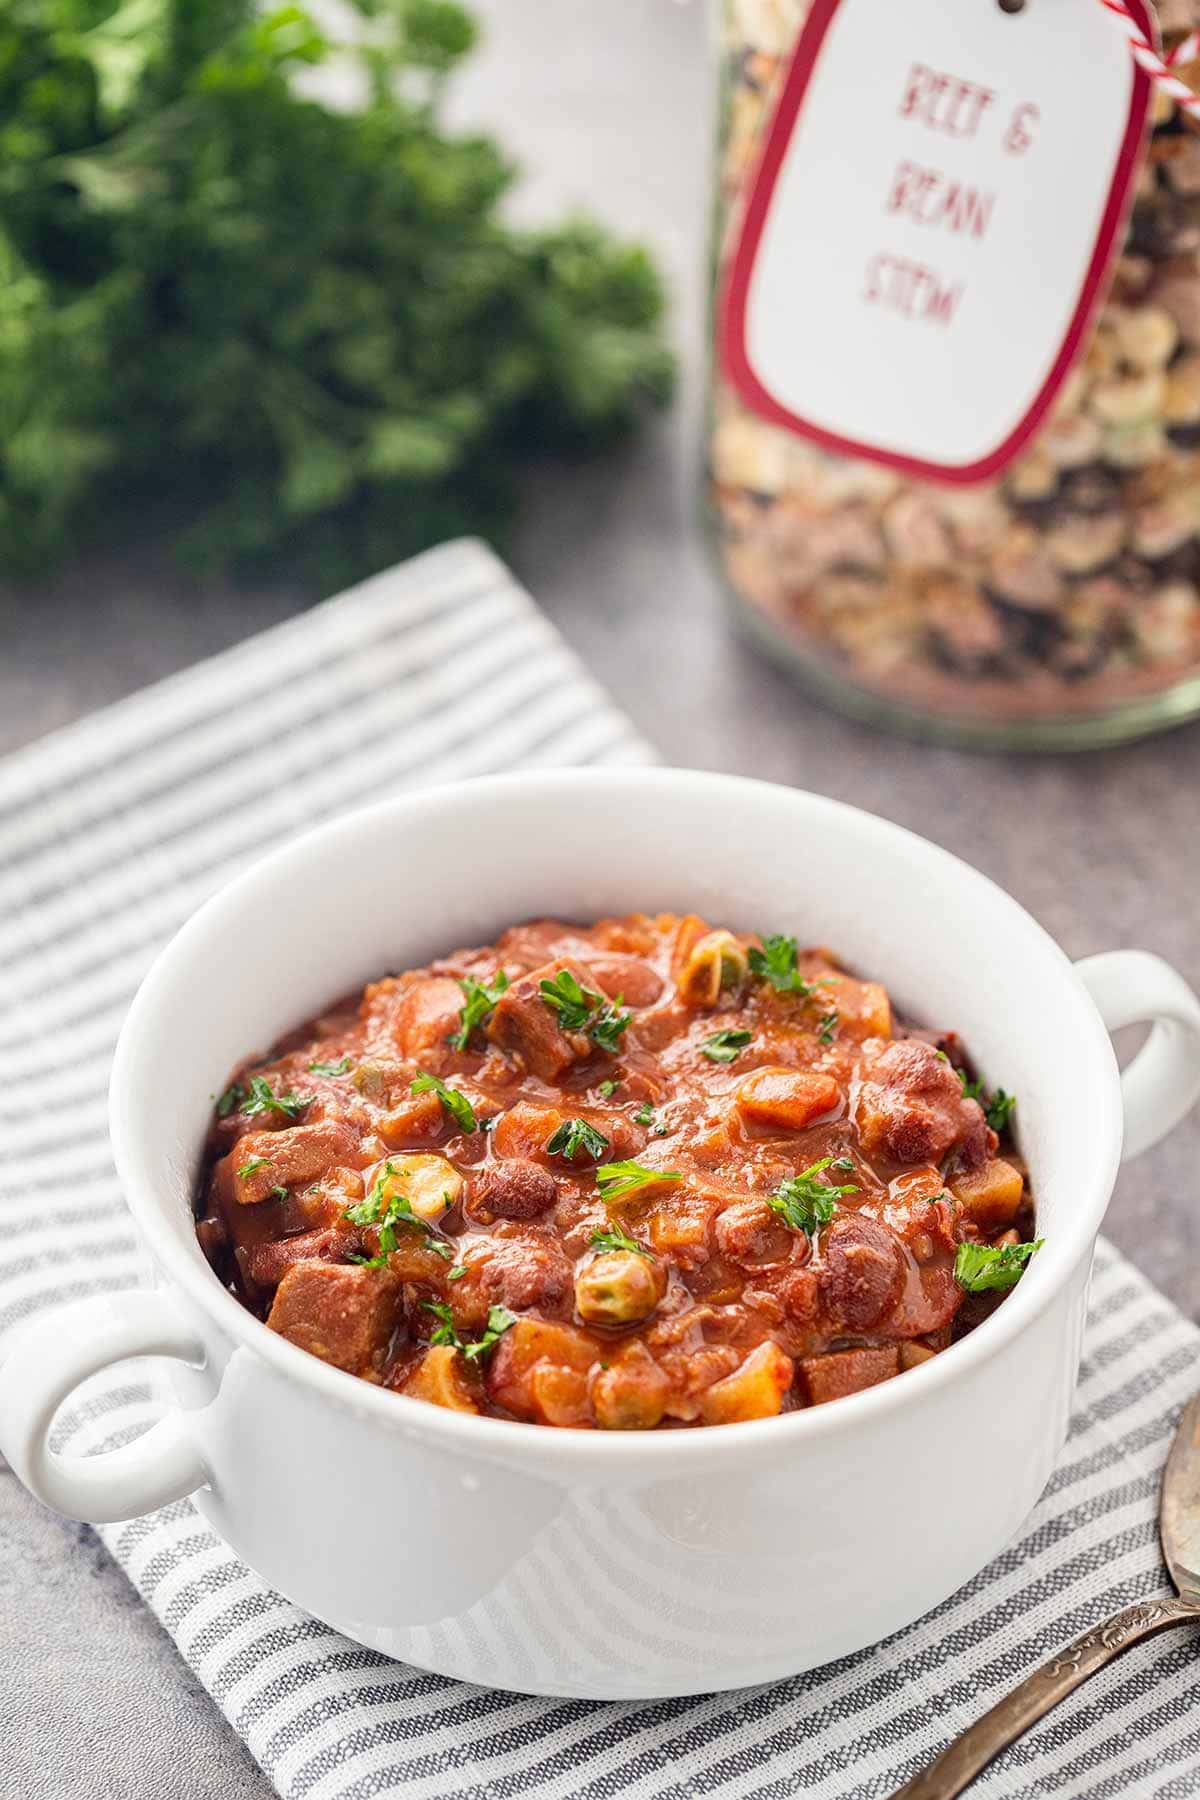
How do I make the Beef & Bean Stew to eat?
Stove Top Instruction: To make the meal, remove the ring and gently pry off the sealed lid. Remove oxygen packet (if used) and discard. Empty the contents of the jar into a large stock pot or dutch oven. Add 6 cups of water and bring to a boil of medium-high heat. Reduce heat and simmer for 20 minutes until veggies and meat are tender. Simmer slightly longer if you like a very thick stew.
I like to serve this with a great crusty bread, but it is also fabulous with my Best Ever Make-Ahead Cornbread!
And if you’re looking for other great meal in a jar recipes, be sure to check out these others from the blog:
- Taco Soup in a Jar
- Beef Taco Rice Meal in a Jar
- Mac & Cheese Meal in a Jar
- Bean & Rice Fajita Casserole Meal in a Jar
- Creamy Chicken Veggie Casserole Meal in a Jar
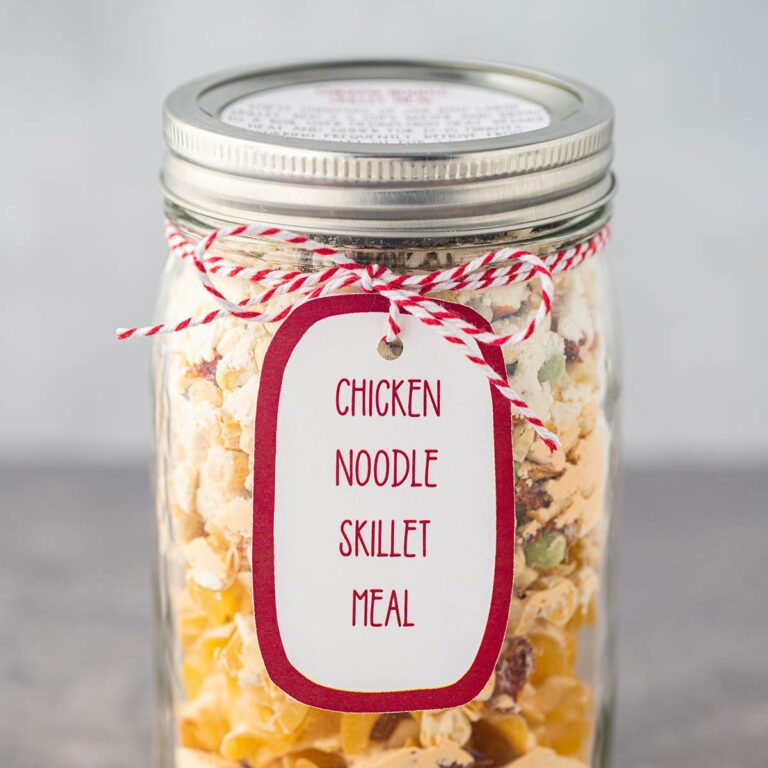
- Chicken Noodle Skillet Meal in a Jar
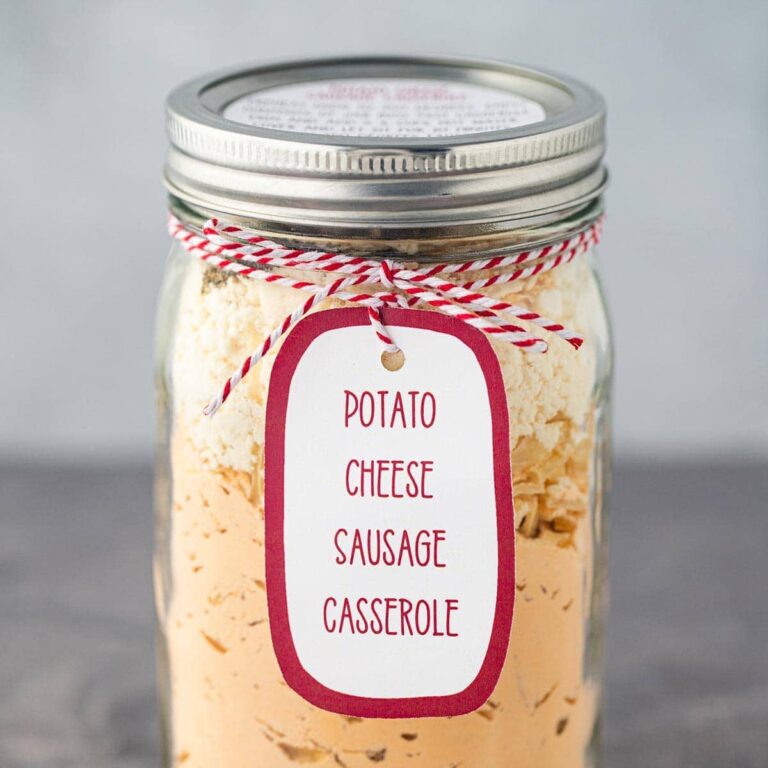
- Potato Sausage Cheese Casserole in a Jar
Beef & Bean Stew in a Jar
EQUIPMENT
INGREDIENTS
- 1 cup quick cook black beans
- 1 cup freeze-dried diced beef
- 2 tablespoon beef bouillon powdered or granules
- 2 tablespoons dehydrated minced onions
- 1 teaspoon granulated garlic
- 1 teaspoon thyme
- 2 tablespoons tomato powder
- 1 cup dehydrated diced potatoes
- 1 cup freeze-dried mixed vegetables
- 1 teaspoon salt
INSTRUCTIONS
- Layer ingredients into a clean quart-size mason jar in the order listed above. Shake to settle contents.
- Place new canning lid on top of jar. Using wide-mouth attachment for a FoodSaver, vacuum seal lid onto jar following instructions from your FoodSaver manual. (You can also insert an oxygen absorber before putting on lid if you'd like.)
- Remove vacuum attachment and put ring on. Tighten by hand, but don't over tighten.
- Label and date. Store in cool, dry location.
To cook:
- Gently pry lid off of jar and discard. Remove oxygen packet (if used). Empty contents of jar into large stock pot or dutch oven. Add 6 cups water and bring to boil over medium-high heat. Reduce heat and simmer for 20 minutes.


What is TVP?
Sorry about that – I’ll go back in and elaborate a little more on the post. TVP is “textured vegetable protein”. It is a soy product – used as a no-fat meat substitute.
TVP is Textured Vegetable Protein usually used in vegetarian meals. It is usually found in a can, in vegetarian section or near baked beans section of the supermarket.
Can you dehydrated the beef or chicken yourself for the soup?
These recipes are developed using freeze-dried meats, which are not the same as dehydrated. If you have a home freeze-dryer you could absolutely use meat that you have freeze-dried yourself. And if you have a freeze dryer I am super jealous – I have had one on my wish list for years now! ;). I have not tested the recipes for use with dehydrated meats (which are usually similar to jerky) – theoretically it would work, you just might need to add additional liquid and play with the cooking time.
I use canned beef from keystone, the 14oz. can cause I cannot afford freeze dried. I add when meal is almost done. They have a 5 year shelf life and if you keep a rotation it works great. I do this a lot with soups in a jar also for winter time. They also have ground beef, chicken, Turkey, and pork. You can go to Amazon to purchase and look for their deals and get free shipping.
Perfect! I was just going to put an update on the posts about this. Freeze dried meat is almost impossible to find right now, and if you can find it, it is about 5x more expensive than normal. I was just thinking about it yesterday and then saw that you posted this morning to leave out the meat and do everything else as normal. Then keep canned meat in your storage, and add that when you go to cook the meals! I’m so glad you thought of that and posted about your experience! Thank you!! 🙂
How would you reduce the recipe for a pint jar.
A pint jar is half of a quart, so you could either keep the recipe as is and split the ingredients into 2 pint jars, or you could halve the recipe and use 1 pint jar.